
Key Lime Pie for Two

Key lime pie always reminds me of my wedding in Key West so Key lime pie always makes me happy! Key limes were actually the jumping off point for our theme. We had a Key lime cake and the florist used Key limes in some of the arrangements. We also sampled LOTS of Key lime pie while on our honeymoon. I can’t wait to go back! In the mean time I will console myself with these cute little individual sized Key lime pies. I wanted something that tasted like those pies in Key West but we also don’t need to eat a whole pie so these perfect little portion control pies for two really have that authentic taste I was looking for!


Happy Day!
You can use regular grocery store limes in this recipe. I’m in New York so Key limes aren’t readily available. You won’t be able to taste the difference, I promise! IF you do have Key limes available to you, you will need 10 of them to get 1/4 cup juice. You will also need two mini pie plates, like these: Corningware French White III Mini Pie Plate. These are 5.4 inch x 1 inch. It’s also important to add the filling to the crust while it’s still warm so the filling “sticks” to the crust and doesn’t separate when you cut into it. If your crust does cool off though you can rewarm it in the oven for 5 minutes before adding the filling.
The filling is really simple. Just whisk the egg yolks and lime zest until the mixture has a light green tint, about one minute.
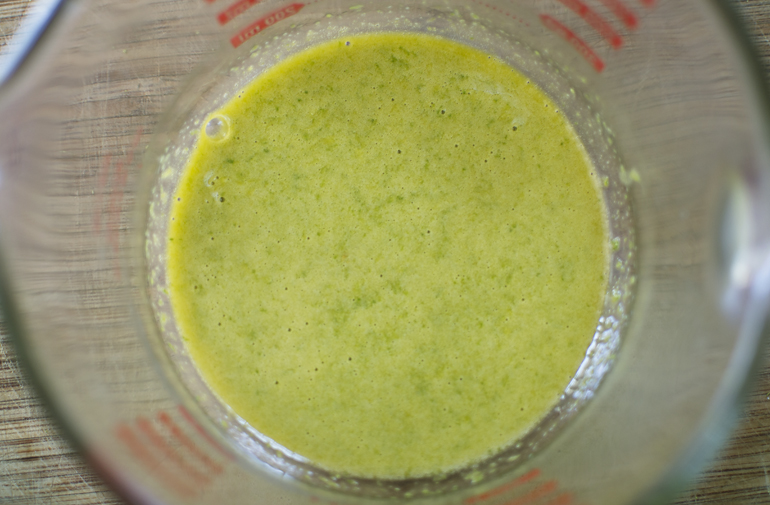
Next you’ll whisk in the condensed milk and then the lime juice of two limes to total 1/4 cup. Don’t be tempted to use bottled lime juice, it’s just so tart tasting and you won’t get a great tasting pie. Cover the mixture and let it rest for 30 minutes. This will thicken it.

While the filling is thickening make sure your oven rack is in the middle position and heat it to 325°. Process the graham crackers in the food processor, mix in the butter and sugar. Sprinkle crumb mixture between the two pie plates and using the bottom of a measuring cup press the crumbs into and even layer on bottom and sides of the pie plate. Bake the crust until it’s fragrant and beginning to brown, about 13-18 minutes. Transfer the pie plates to a wire rack but don’t turn off the oven yet. Add the filling to the warm crust.

Bake pies until the center is firm but jiggles slightly, 15 to 20 minutes. Let the pies cool on a wire rack for about an hour and then wrap them loosely and refrigerate for 3 hours.
Now we didn’t come all this way to put imitation topping on our cute little pies. This topping is super simple and quick. It’s lightly sweetened and perfectly balances the tartness of these pies so don’t skip it! Using your handheld mixer beat the cream, sugar and vanilla in a medium bowl on medium low speed until foamy. Increase the speed and beat until soft peaks form, about another minute longer. Spread over the top of the chilled pies and have a taste of Key West!

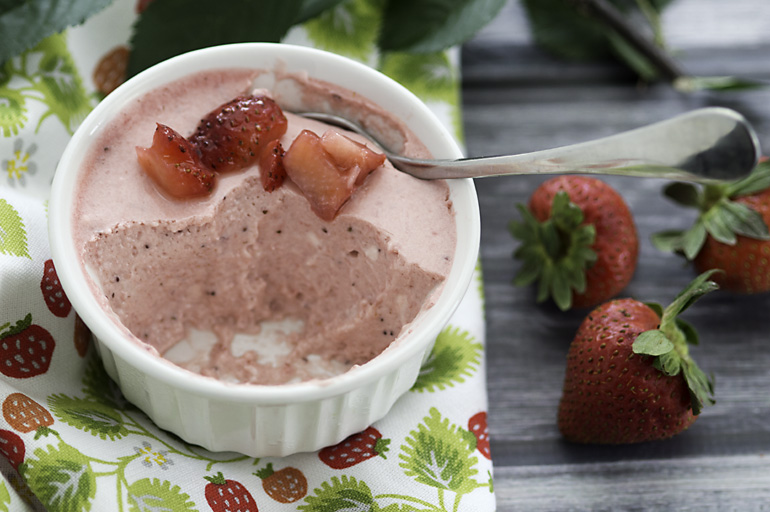
Fresh Strawberry Mousse for Two


It’s finally strawberry season here! I usually make jam or strawberry shortcake but I wanted to elevate them somehow and this recipe feels very summery and elegant! I love that you can make it up to 48 hours in advance too.
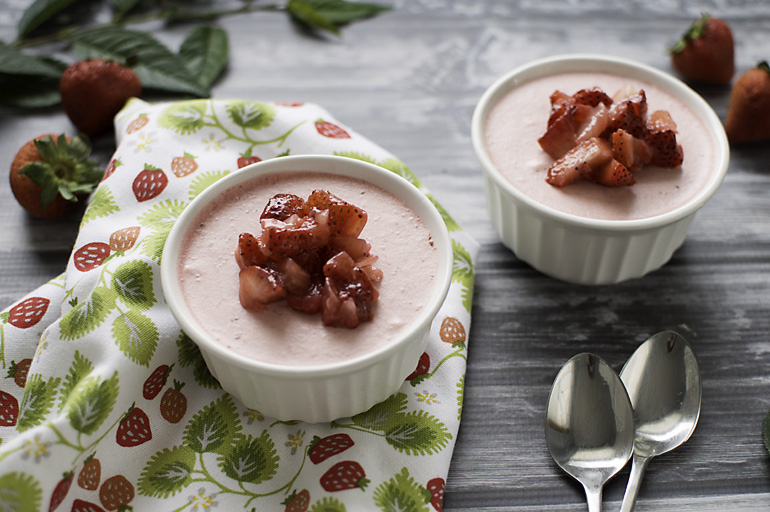
This make-ahead strawberry mousse is rich, creamy and full of intense berry flavor! Processing the strawberries into small pieces and letting them sit with sugar and a little salt causes them to release liquid. Reducing that into a syrup before adding it to the mousse reduces the amount of moisture in the dessert and concentrates the berry flavor. Pureeing the juiced berries results in bright, fresh berry flavor. Gelatin adds structure and cream cheese gives the mousse the perfect rich and creamy texture!

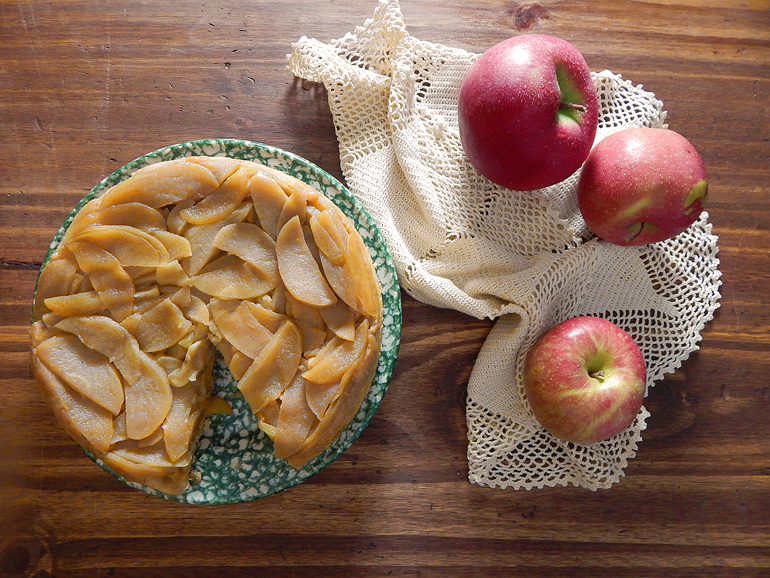
Apple Upside-Down Cake

Growing up in Florida I never saw an apple tree, I saw plenty of orange trees but always wished I could go apple picking. I would see images of people on fun apple picking outings and feel instantly envious! I wanted fall leaves and crisp cool autumn days! While everyone up north was wearing cozy fall sweaters I was still wearing my shorts and flip flops and blasting the air-conditioner! (I have to admit though that when there’s so much ice on the ground in the winter that I can’t walk my chihuahua I wish for Florida weather! ) Ack! We wish for what we don’t have sometimes! 

I didn’t get to see a real live apple tree until I moved to New York six years ago. Since picking my own apples was something I always wanted to do, when I got the chance I picked way too many for two people to ever eat! We gave some away but still had too many so I started making spiced apples in the crockpot for spooning over vanilla ice cream and stirring into oatmeal but I wanted to try a recipe that just lets the flavor of the apples shine through. I think this upside-down cake recipe really showcases my gorgeous apples without hiding behind a lot of spices although if you really wanted to you could certainly throw in some apple pie spice if you like.
The cake part of the recipe is really just a quick bread so it comes together easily plus the addition of cornmeal in the batter helps the cake hold up to the weight of the apples. Pre-cooking some of the apples before putting them in the bottom of the pan infuses the apples with caramel-like buttery goodness!

I definitely recommend using firm apples like Granny Smith so that your apples hold their shape during the cooking process. I did mix it up with what I used but all the apples I had were pretty firm.
You will need a 9-inch cake pan with 2-inch sides for this cake. If you don’t have one you could use an 8-inch square pan. Give this easy cake a try and let me know what you think!

Avocado Brownies with Peanut Butter Swirl


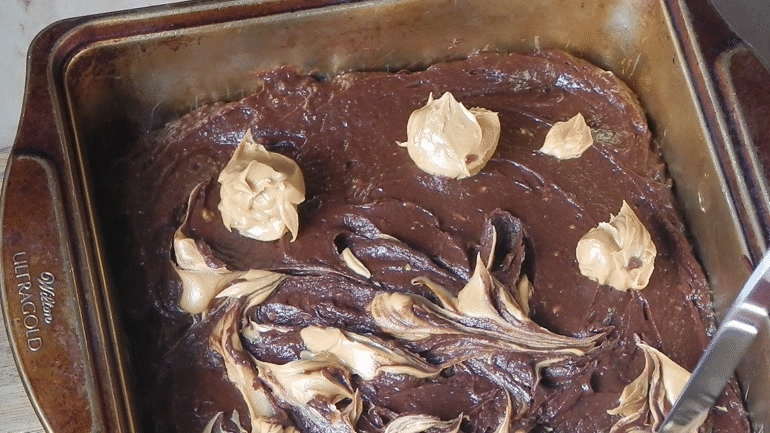
I’ve been using avocado lately in salads and other savory dishes where you would expect it but I decided to try out avocado in something sweet and I was really happy with the results! I replaced all the butter in these brownies with avocado and it turned out really delicious! I’m a big fan of peanut butter with chocolate so I decided to swirl some on top. The result is brownies that are fudgy and deeply chocolaty with just the right amount of peanut butter.

There are many reasons to love avocados: their creamy taste, their impressive fiber content, about 2 grams per ounce, and the many vitamins (B6, C, K, folate…) they contain. Plus, the potassium helps to regulate blood pressure and the healthy fats are very beneficial.
I found this side by side comparison of avocado vs. butter:

Wow! Quite the difference! Even though you should still eat these brownies in moderation I feel A LOT better about them! 

Rustic Free-Form Tartlets for Two

I love summer fruit pies but making a whole pie for just two people is just too much not to mention the pie crust takes time. This simple free-form tartlet is a great alternative to pie.

I wanted a flaky crust so I learned a new technique called fraisage, in which the dough is smeared with the heel of your hand, spreading the butter pieces into long, thin streaks between layers of flour and water. This technique is perfect for free-form tarts where leaking might be a concern. Because you are creating alternating layers of butter and dough, you are less likely to get a clump of butter that will melt during baking and form a hole in your crust as it bakes.

Fraisage Technique
The dough is then lifted up and back over the fruit leaving the center exposed, and loosely pleated. The fruit needs only the simple addition of sugar, 3 to 5 tablespoons depending on the type of fruit.

Some of the best mix of fruits are stone fruits and berries (I’m using peaches and blueberries but plum and raspberries or apricots and blackberries would be delicious too), you can use only one type of fruit if you prefer. Peeling the stone fruit, even the peaches, is not necessary.

Taste the fruit before adding sugar to it; use the lesser amount if the fruit is very sweet, more if it is tart. Be sure not to add the sugar to the fruit until you are ready to fill and form the tart, the sugar releases the juice in the fruit and you’ll end up with a soggy crust if done too soon.

Once baked, the tartlets are best eaten warm, or within 3 or 4 hours, although you can reheat them in a 350-degree oven. Don’t forget to add a scoop of vanilla ice cream…heaven!
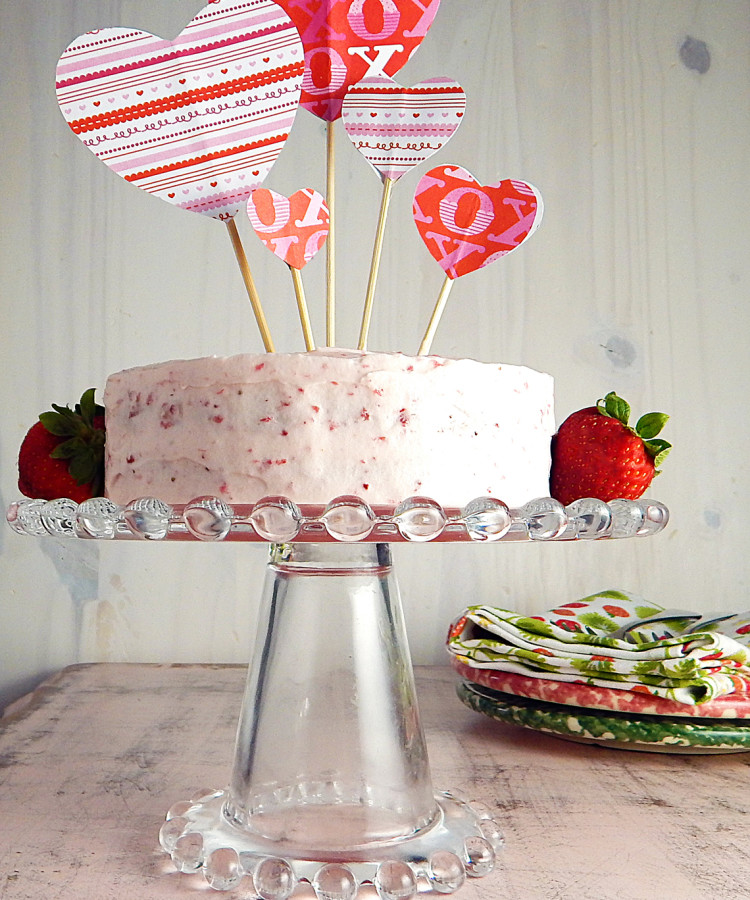
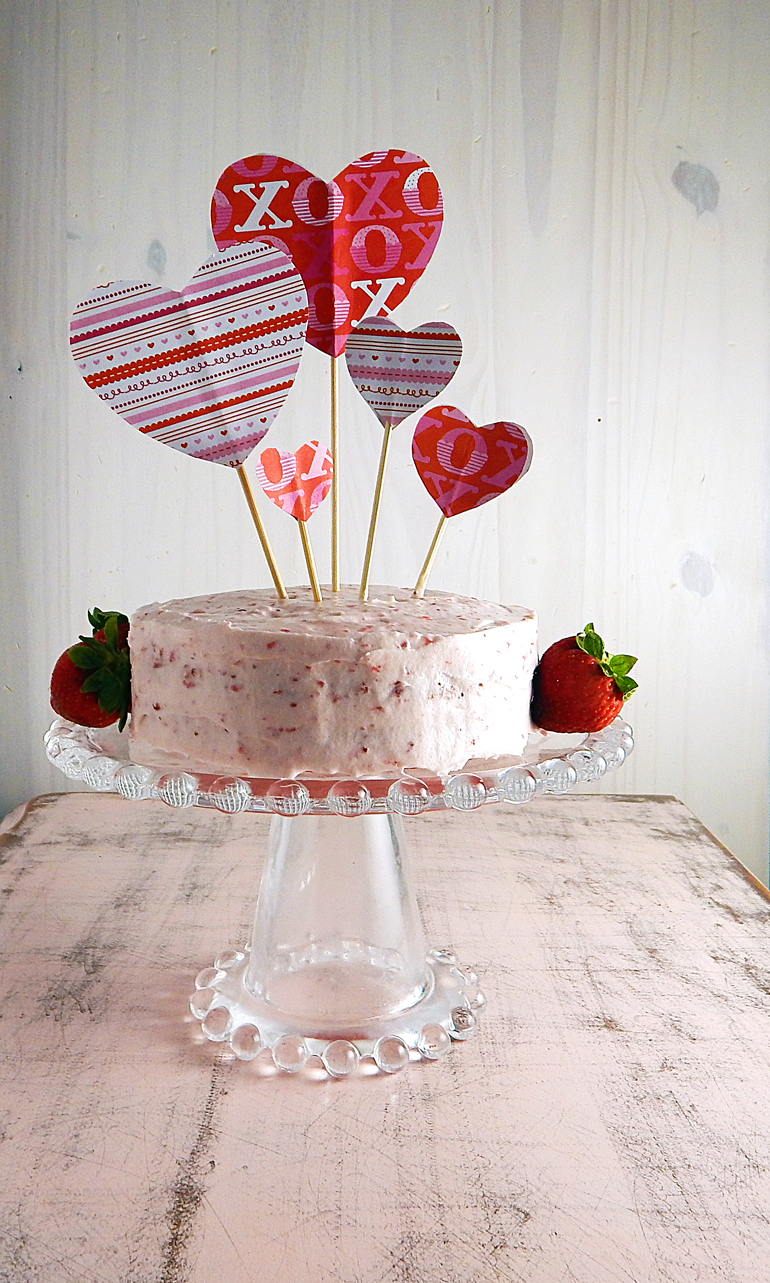
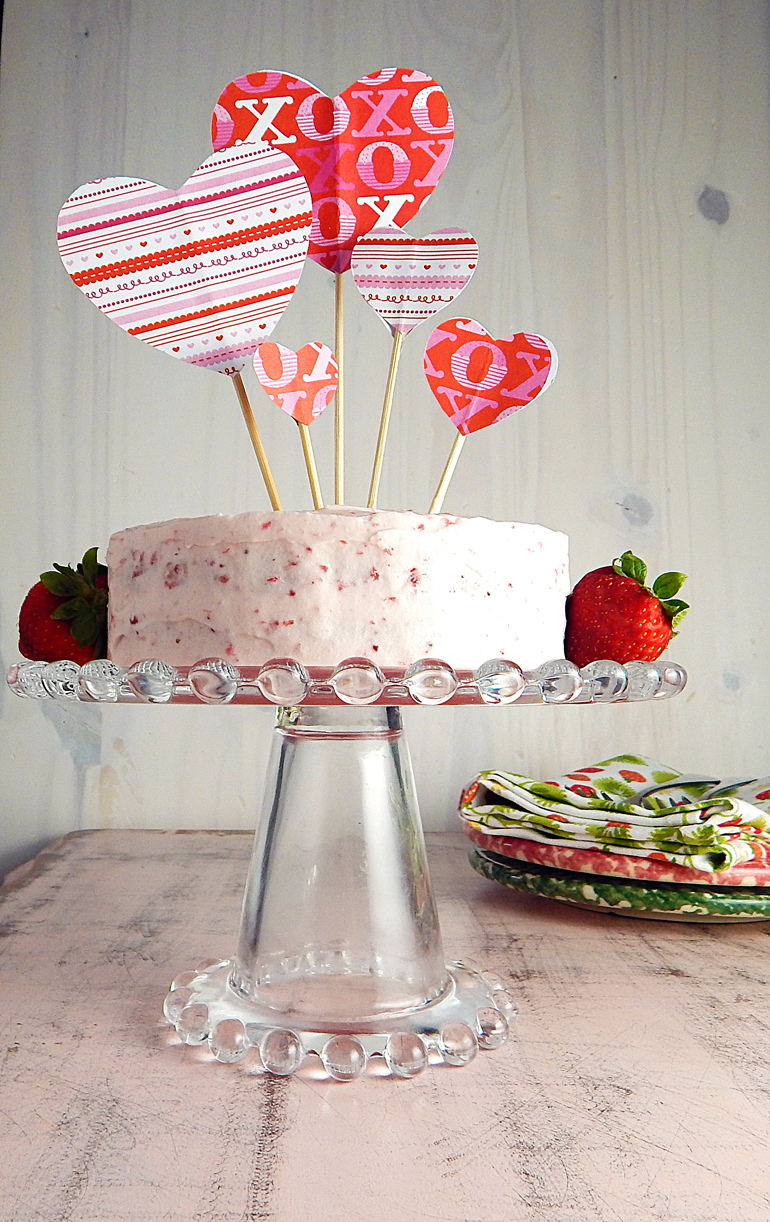
Valentine’s Day Strawberry Cake for Two and a Love Story
My “Gamer” Valentine’s Day Love Story
We met in an online game. Star Wars Galaxies to be exact.
It’s weird telling people how we met, “How’d you meet?” “umm…in an online game…” We are met with either blank stares or “That’s so cool”! You’re never sure what you’re going to get. Even in this tech savvy world we live in it still seems weird to some people, like it can’t be taken seriously. For instance we can’t say, “Yeah we met at the United Nations Convention on Biological Diversity or something important sounding like that and to make matters worse it’s a Star Wars game…geeky AND weird!
(There’s more to read below!)
I ended up in his guild, (for you non-gamers that’s a group of like-minded people that share common goals in a game, like taking down the baddest boss (monster) in the game. We started talking some or rather typing and eventually ended up curious about each other’s real names and he miraculously guessed mine on the very first try! I was pretty astounded and he had my attention after that!
I have to say that meeting in this way turned out to be really important in that we got to know each other without any physical distractions. It was just what we typed to one another and nothing else. Our thoughts and our feelings only. This built such an intimacy between us that I never knew could exist. That beginning bonded us in a special way. We knew each other, I mean REALLY knew each other before we ever physically met…not to mention my typing skills improved dramatically!
(Keep reading!)

We eventually moved on from Star Wars and onto the world of Azeroth (World of Warcraft) where our relationship grew until we finally decided to meet! It had been nearly two years since we’d met online and finally meeting in person was one of the most exciting, thrilling, heart-thumpingly nervous days of my life! Meeting him really “sealed the deal” in my heart and I have never looked back!
Now we get to game side by side instead of over 1000 miles apart and we look forward to “leveling” together offline and on for the rest of our lives!
Happy Valentine’s Day and….May the Force be with You!
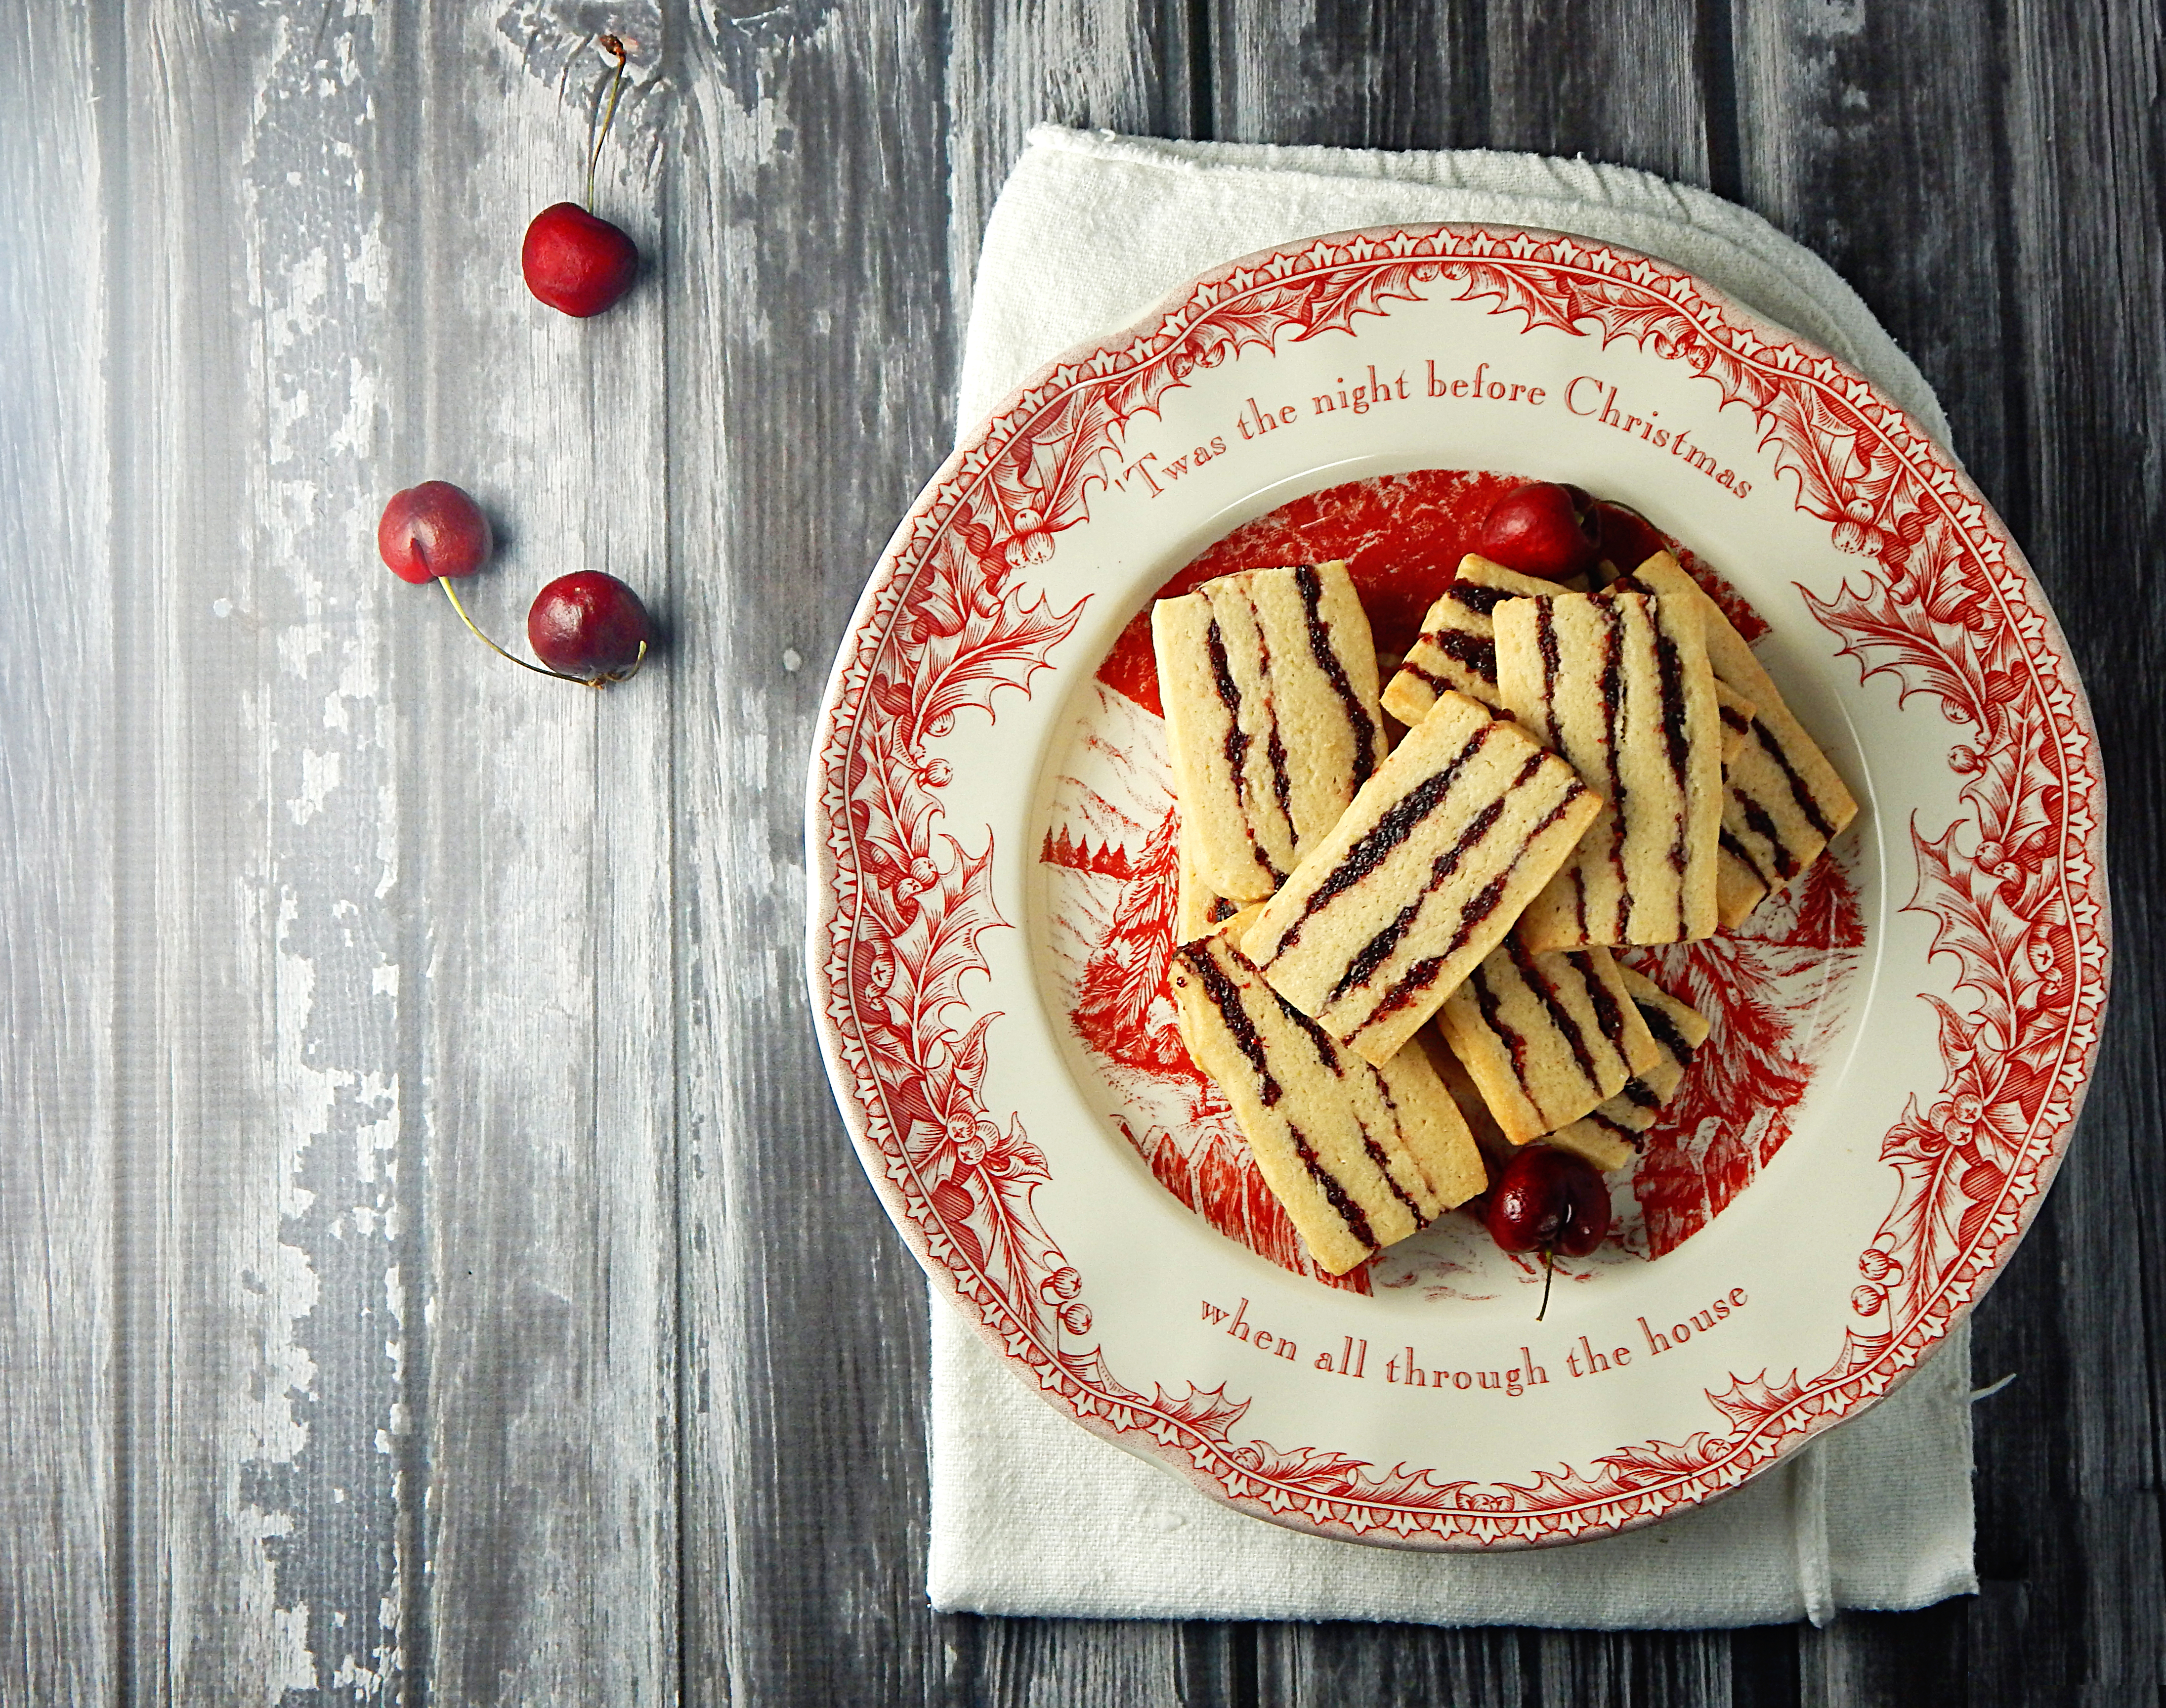
Cranberry Cherry Ribbon Cookies


You need to try these fun to make cookies! I got this recipe from a book I bought several years ago called The All American Cookie Book by Nancy Baggett. This book has been one of my favorites and I have a TON of cookbooks! Her recipes are all perfect, you seriously can’t go wrong whatever you choose to bake from it and her photos are gorgeous, but what I love the most is the history of each recipe and where it comes from. She also has the most entertaining excerpts from very old cookbooks when they were using wood burning stoves to get their baking done! For instance some of the kitchen wisdom that comes from Estelle Woods Wilcox from the book Buckeye Cookery and Practical Housekeeping, 1880 is this; “Many test their ovens in this way: if the hand can be held in the oven from twenty to thirty-five seconds (while counting twenty or thirty-five), it is a ‘quick’ oven, from thirty-five to forty-five seconds is ‘moderate,’ and for forty-five to sixty seconds is ‘slow.’ ” Can you imagine cooking like that?! I LOVE little glimpses into the past like this though!
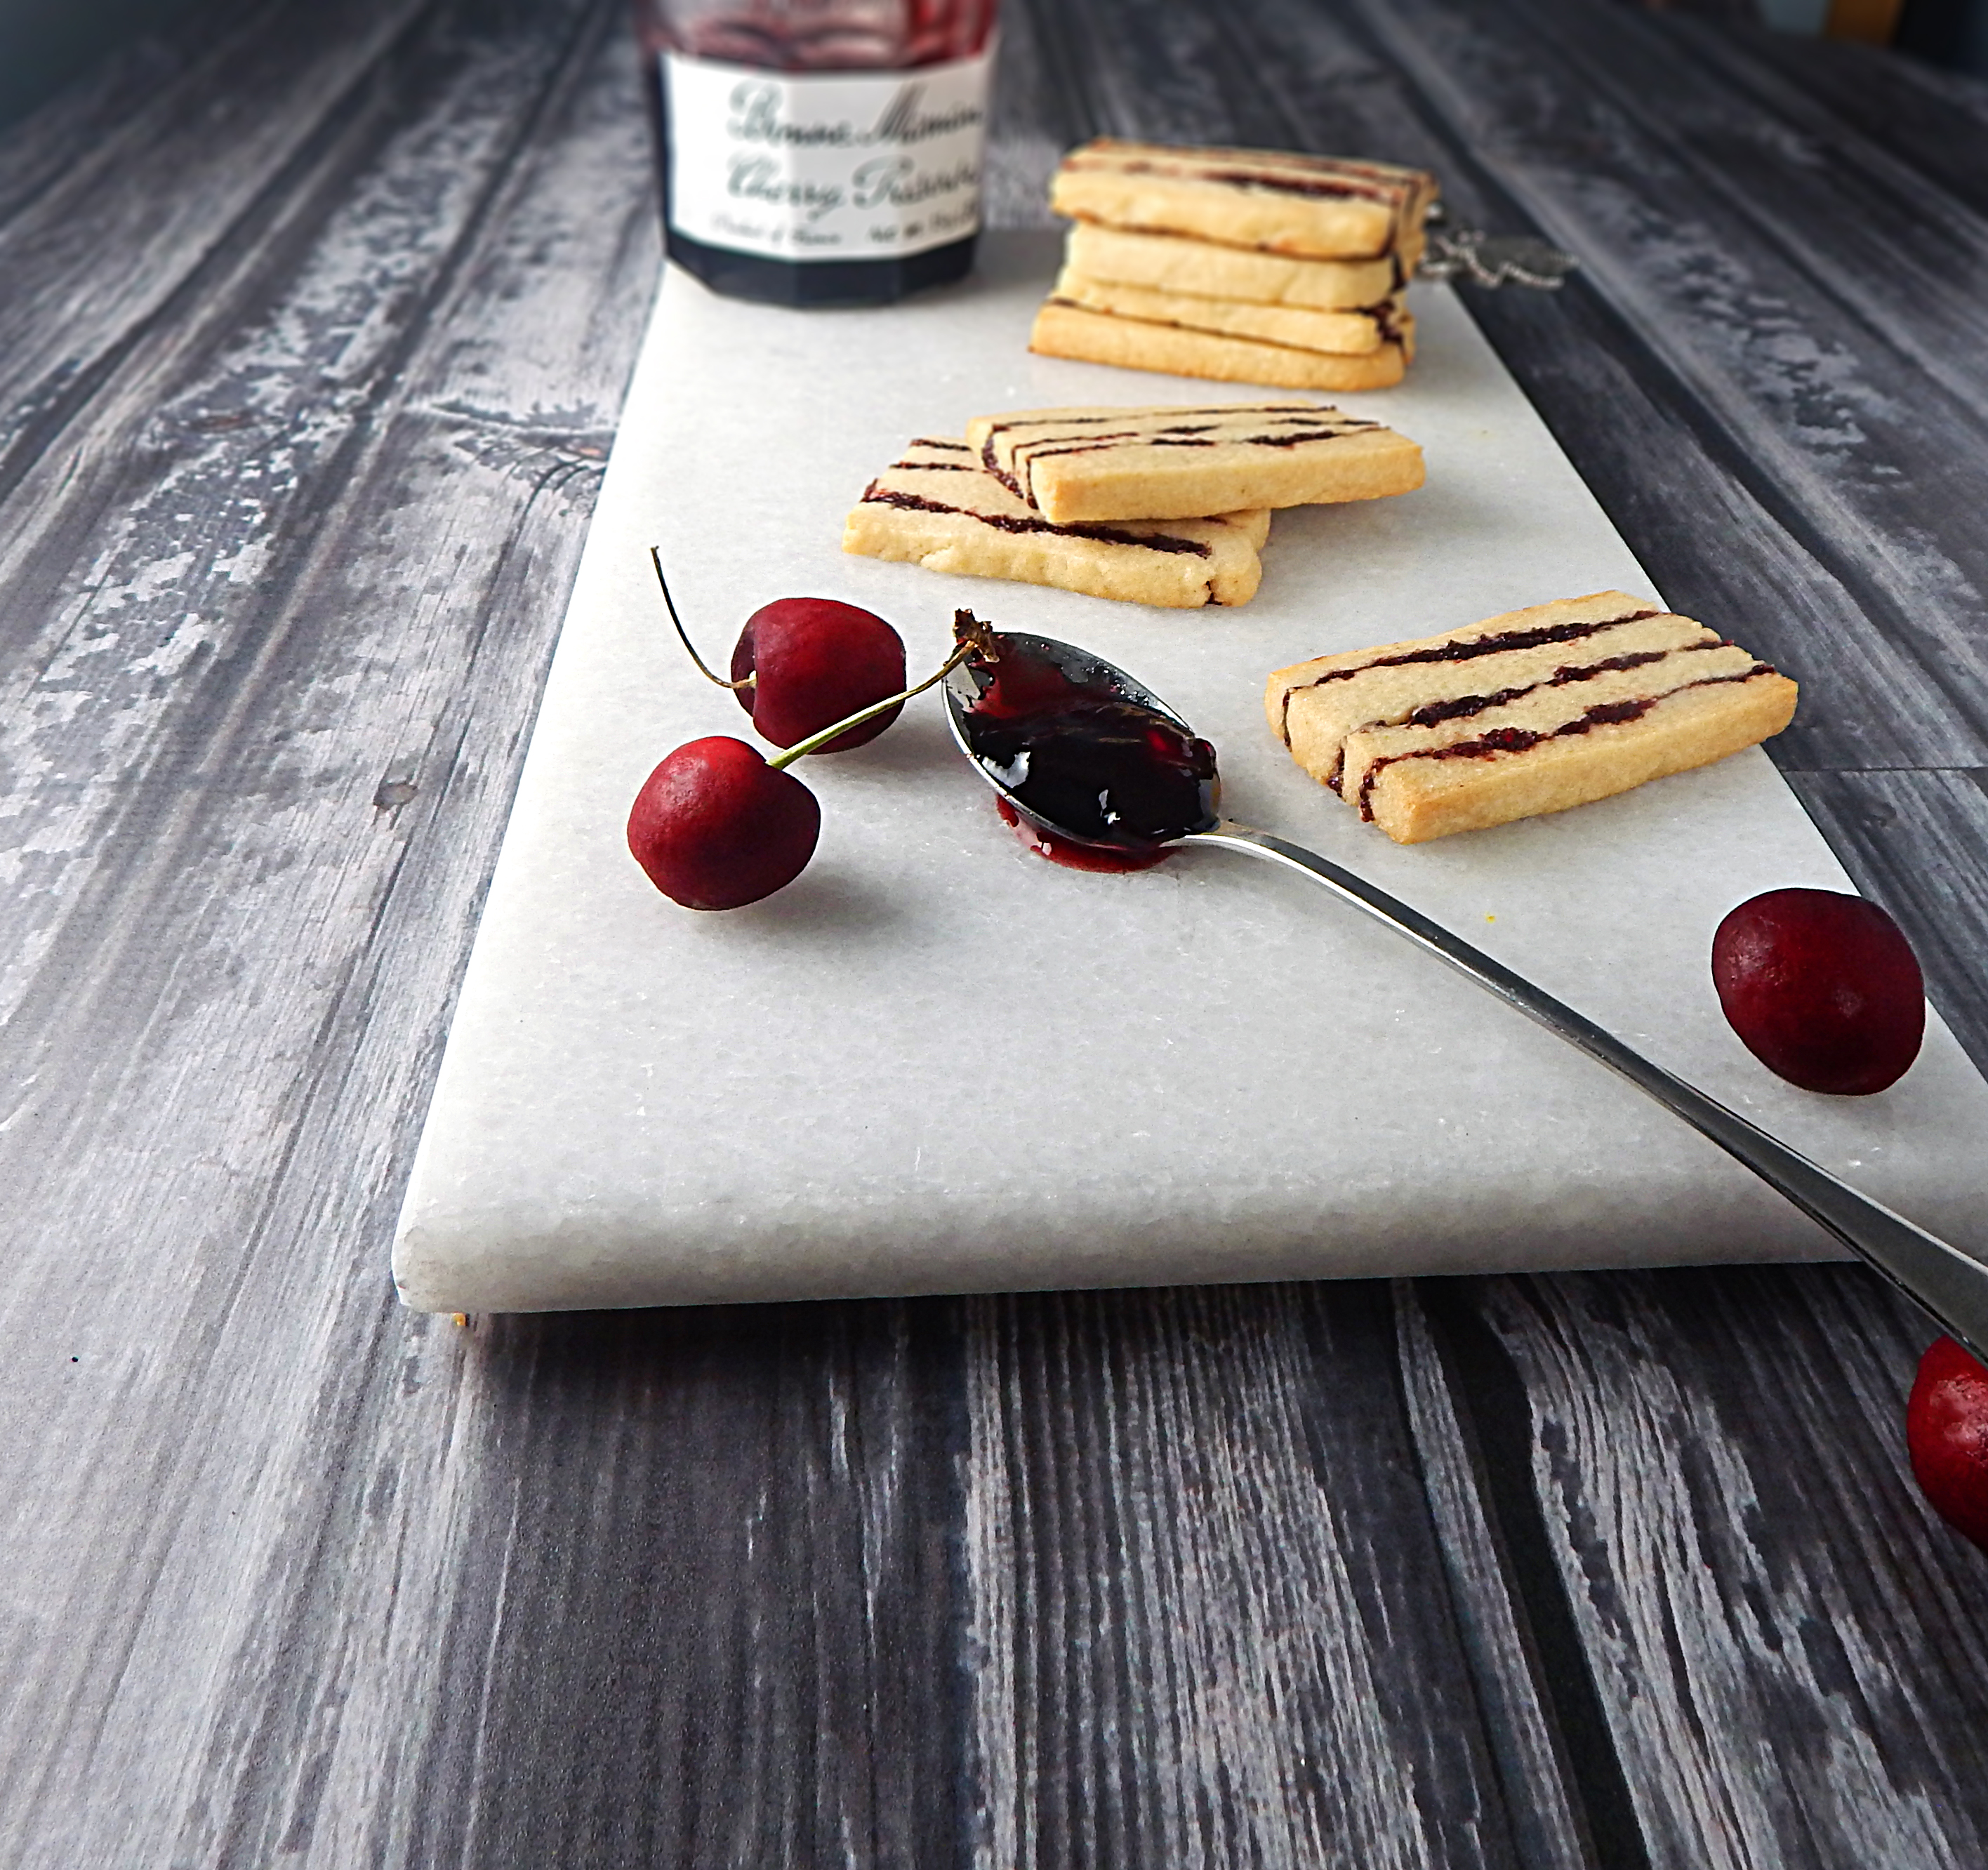
This recipe involves placing alternating layers of cranberry-cherry filling and vanilla dough in a loaf pan and freezing the stack until firm. The frozen loaf is cut crosswise into three long blocks, which are than cut lengthwise into pretty red and white striped ribbons and then baked.

These cookies have a great chewy-crispy texture and an exceptional fruit flavor and keep very well. The tart-sweet flavors are perfect together!
Mississippi Mud Brownies
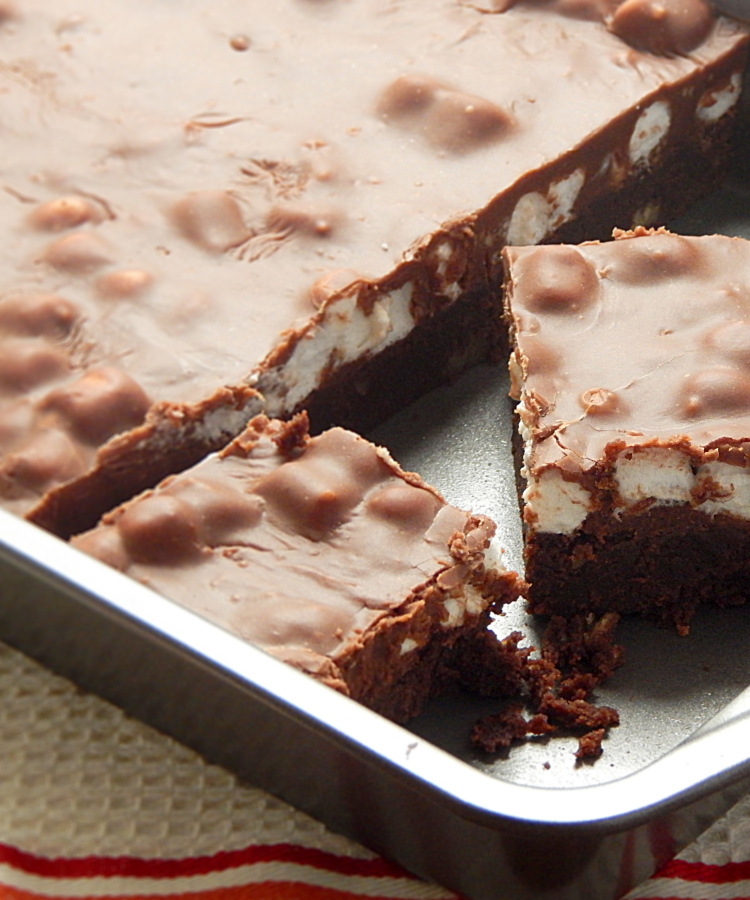
I was seriously craving chocolate after seeing all the Christmas dessert recipes all over the web and this brownie really delivers on ooey-gooey, nutty, chocolatey yumminess!
These brownies have lots of chocolate! There is a dense, chocolatey, nutty brownie layer on the bottom, on top of that are the marshmallows, and then you top all of that with a layer of chocolate frosting! You really need to try these for yourself!

You’re definitely going to want a glass of milk with these! These are super easy to throw together. You’ll definitely want to share these, well maybe… This recipe makes 24 brownies and I don’t think even I can eat that many, and I LOVE brownies!

So don’t make regular ole brownies when you can take your brownies to the next level with these!

The Ultimate Banana Bread

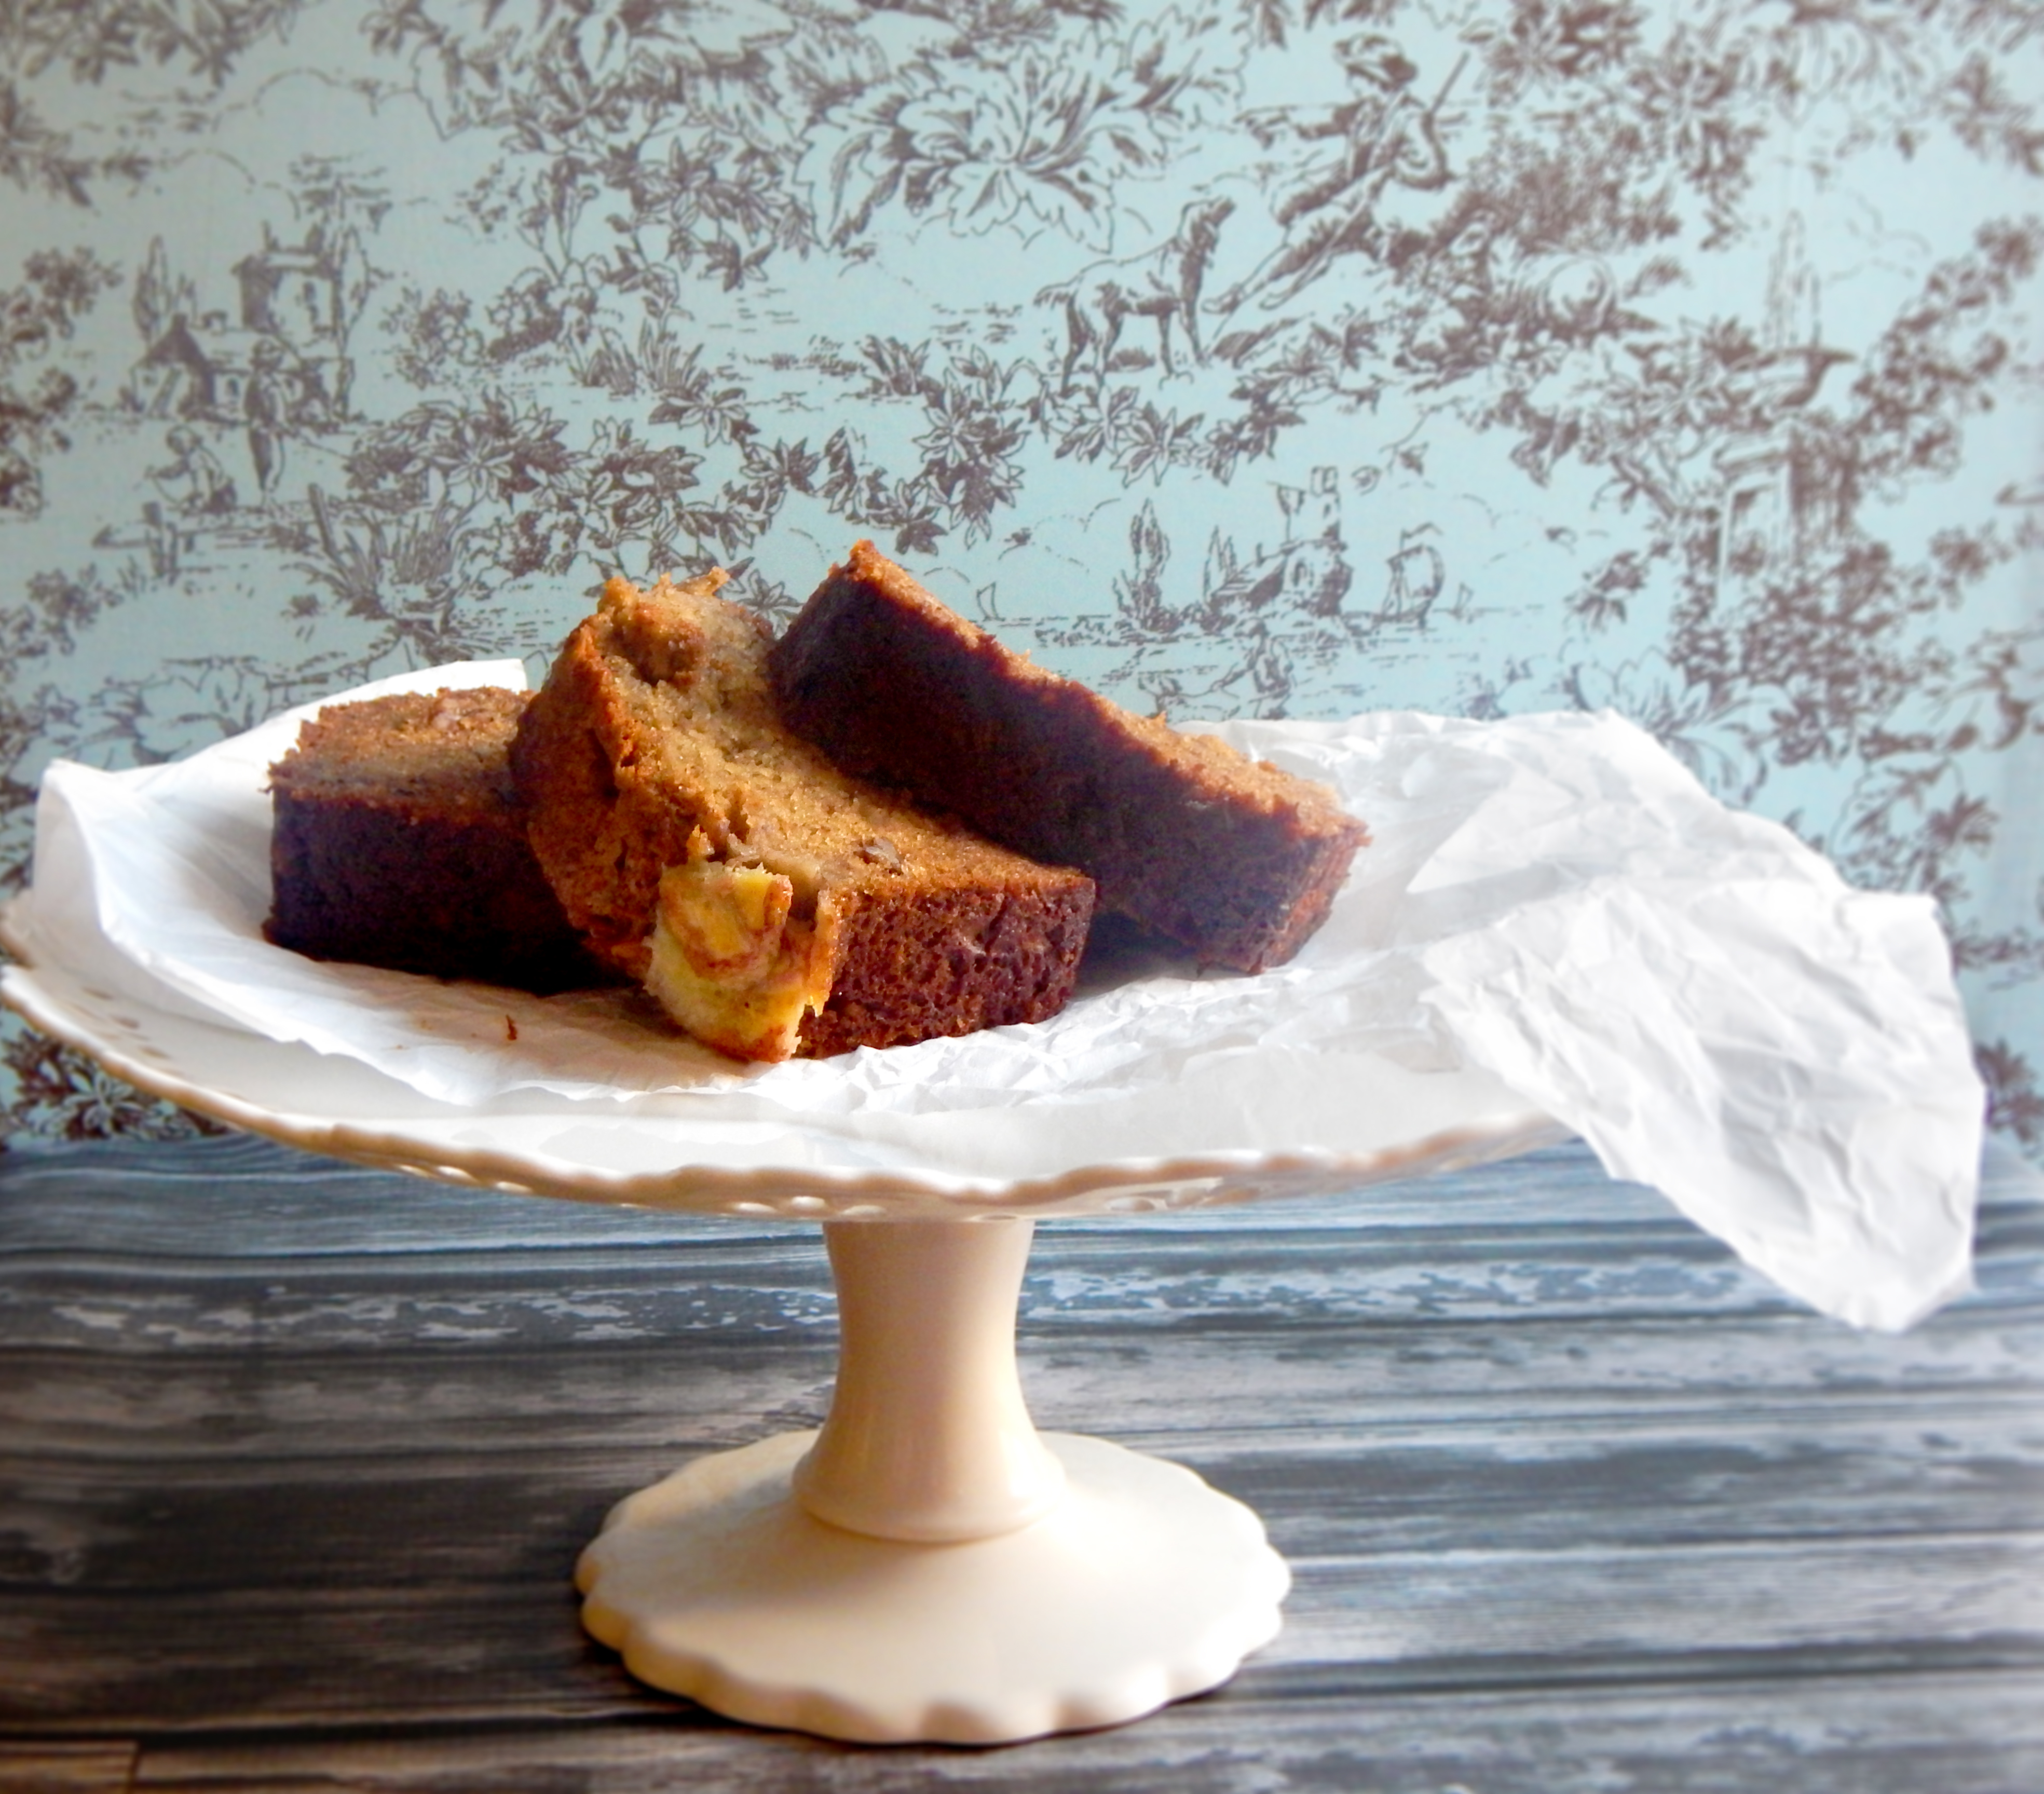
If you’re looking for the best banana bread but don’t want to make a dozen recipes trying to find it, rest easy, I’ve done it for you! This recipe from Cooks Illustrated has a little science behind it in extracting the most banana flavor possible from bananas for a moist, tender loaf with over-the-top banana flavor!

Most banana bread recipes use just 3 bananas but this one uses 6! How do you add that many bananas without getting pudding you ask? There’s a secret to it….we’ll extract the juice from the bananas!
Who Knew Bananas had Juice?
We’ll add banana flavor without adding too much moisture to our banana bread by microwaving the fruit and draining it. Then we’ll simmer the banana liquid in a saucepan until it’s reduced and then incorporate it into the batter. We’ll use brown sugar instead of granulated and swap out oil for the nutty richness of butter. Toasted pecans give our banana bread a nice crunch, and a sixth banana sliced thin and caramelized on top of the loaf gives this banana bread an enticingly crisp, crunchy top.
Do it Ripe!
As bananas ripen, their starch converts to sugar so be sure to use very ripe, heavily speckled (or even black) bananas in this recipe. If you use anything less than very ripe bananas, you’ll end up with a very bland loaf.
EXTRACT JUICE
Microwaving ripe bananas for 5 minutes causes them to release “juice.”
STRAIN IT OUT
After straining the bananas, you should have 1/2 to 3/4 cup of liquid to work with.
REDUCE THE JUICE
Reducing the banana liquid yields a concentrated liquor, intensifying flavor without making the loaf wet.

Pour the reduced banana juice back into the bananas, mash and add the butter, eggs, brown sugar and vanilla. Pour banana mixture into the flour mixture and stir until just combined with some streaks of flour remaining. Gently fold in the pecans. Pour the batter into a pan sprayed with cooking spray. Add the 6th banana to the top, layering the banana slices on either side of the loaf. This will add more banana flavor and it looks pretty! Make sure to leave a 1 1/2 inch wide space down the center so the loaf will rise evenly.

It really is best after it’s been cooled a bit and fresh from the oven. That’s when the crust is the crunchiest! Okay enough talking, the banana bread is calling me!
Salted Butter Caramel Sauce


Ooey, gooey caramel…who doesn’t love caramel?! I love it on ice cream, I love to dip fruit in it…I love to eat it right out of the jar! I also love it drizzled on apple desserts like this Apple Crumble. This one’s easier because you add the water first instead of the sugar so you don’t have to worry about stirring right away. Keeping the lid on the pot also allows condensation to keep crystals from forming. Try it out if you’re new to making caramel sauce! Make sure your pot isn’t too small because when you add the cream the mixture will boil furiously.
If you don’t own a candy thermometer, spot-check the sugar syrup with an instant-read thermometer that can read temperatures in excess of 350 degrees. Otherwise, follow the time approximations in the recipe and watch the color of the sugar syrup; it should be a deep amber color before the cream is added. To keep the sauce from clumping, make sure the cream is hot before adding it to the sugar syrup; try to coordinate it so that the cream reaches a simmer when the sugar syrup reaches 350 degrees.


