Pasta with Bacon, Butternut Squash and Sage for Two
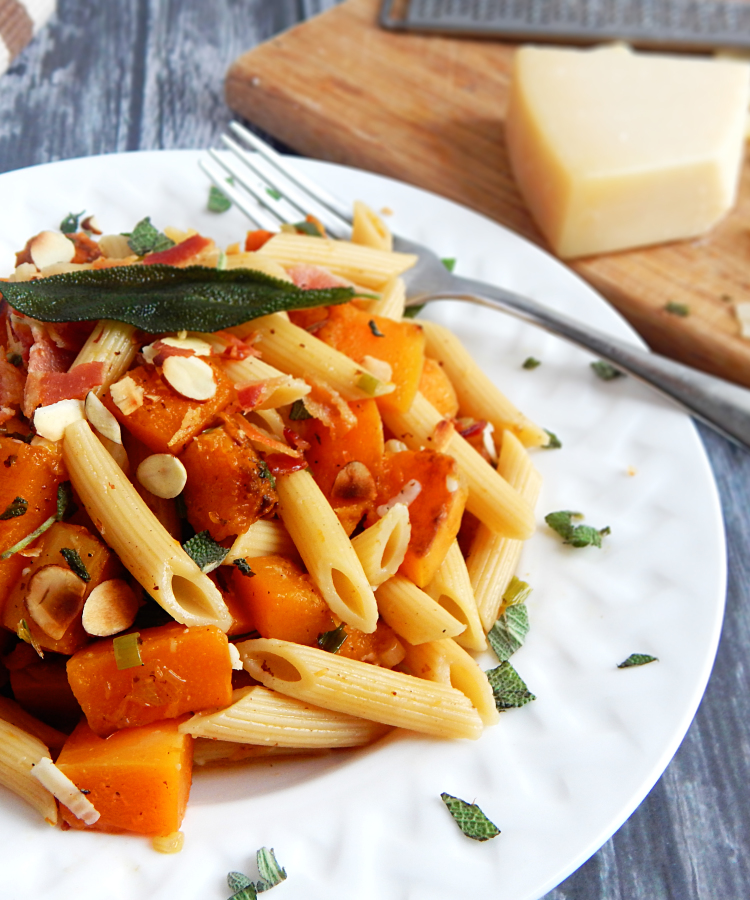
Butternut squash and sage are two ingredients that say winter to me and I love them both, but together they are a marriage made in heaven! Add bacon and you’ve got a happy little family of yummy flavors!
Cooking the sage in the rendered bacon fat makes the perfect herb infused oil for sauteing the squash.
There are a few tricks to coaxing the most flavor out of butternut squash and one is caramelizing it. It helps to dry out some of the wateriness of the squash and brings out some of its inherent sweetness, adding butter and sugar help to bring out the sweet nutty notes of the squash even more.
The scallions add some brightness to the dish and the nutmeg adds just the right spice or earthiness to the dish. Adding parmesan and a little lemon juice at the end along with toasted almonds for some textural crunch really brings the whole dish together!


- 4 slices bacon, halved lengthwise, then cut crosswise into 1/4-inch pieces
- 4 large fresh sage leaves, plus 1 tablespoon minced
- 1/2 medium butternut squash, peeled, seeded, and cut into 1/2-inch dice
- 1/2 tablespoon unsalted butter
- 3 scallions, sliced thin (about 1/2 cup)
- 1/8 teaspoon freshly grated nutmeg
- 1/2 teaspoon sugar
- Table salt and ground black pepper
- 1 cup low-sodium chicken broth
- 1/2 pound penne or other short, tubular pasta
- 1 tablespoon grated Parmesan cheese, plus extra for serving
- 2 teaspoons juice from 1 lemon
- 1/4 cup sliced almonds, toasted
- Cook bacon in 12-inch skillet over medium heat until crisp, about 8 minutes. Remove bacon and reserve.
- Cook whole sage leaves in rendered fat until fragrant, about 1 minute. Remove sage leaves and reserve.
- Return infused bacon fat in skillet and turn to high heat adding olive oil to make one TBSP of oil if needed and heat until shimmering.
- Add squash in even layer and cook, without stirring, until beginning to caramelize, about 5 minutes. Continue cooking, stirring occasionally until spotty brown, 3-4 minutes longer.
- Add butter and allow to melt, about 30 seconds. Add scallions, nutmeg, sugar, 1/4 teaspoon salt and pepper, and minced sage; cook, stirring occasionally, until scallions are softened, about 3 minutes.
- Add broth and bring to simmer; continue to cook 1-3 mintues or until squash is tender,
- Meanwhile, bring 2 quarts water to boil in large Dutch oven over high heat. Add 1 tablespoon salt and pasta. Cook until just al dente, then drain pasta, reserving 1/4 cup cooking water, and transfer back to Dutch oven.
- Add squash mixture to pasta; stir in 1 tablespoon Parmesan cheese, lemon juice, and reserved bacon-sage mixture, adjusting consistency with reserved pasta liquid. Serve with the sliced almonds and more parmesan cheese.
- I double this recipe for company!
In All Things Give Thanks – A Recipe for Thankfulness
Armed with my camera, I’m ready to photograph food that I have labored over and placed in front of the window. I look through the lens and I see the light hitting it in just the most perfect way and it makes me so very happy. I feel grateful. I was surprised by this gift. This gift that I have for my love of cooking, and when I picked up the camera for the first time I never expected the love I feel about the things I cook to show through the lens, but it did and I am grateful.
I reflect a lot. Probably too much. I can get caught up in worrying about things or wishing that I had more and when that happens I start to feel down, but there is one thing that I have discovered that will turn that around EVERY time and that is to reflect on all of the things that I am grateful for. The small things. Sure, I can just do a big ole THANKS for the big picture but that just waters it down. It’s when I stop and reflect on the little things in my day that makes me feel so thankful that tears come to my eyes and spill over onto my cheeks. I see Tom, digging down into the bottom of our overcrowded pantry getting out my heavy stand mixer for me. He’s so neat about it too, and seeing him there doing something just for me, just a little thing, means everything to me. When I see him with our little chihuahua who is all decked out in her pink coat and pink leash, all wrapped up safe in his strong arms as he heads out the door to the vet. I am thankful he cares enough to look silly when his little pink dressed dog isn’t feeling her best.
I started a “Thankful Jar” to help me remember to be thankful and I fill it with little things like; crisp, clean cotton sheets on the bed. Bubble baths. Stumbling to the coffee pot to make coffee in the morning only to find out that Tom already made coffee for me the night before. The perfect leaf that I found on my walk with Missy that reminds me of the beauty of fall. Sipping hot chocolate, feeling all snuggly and warm while it snows outside. Spring flowers. Moss hanging from oak trees. The smell of fresh herbs. The smell of coffee brewing. Listening to birds sing. Seeing an elderly couple holding hands. Getting a text from my son that says, “I love you, Mom.” Hearing Tom whistling from the other room. It stops me in my tracks sometimes. I think about how grateful I am that today, I get to hear that. Him being him and me being here with him. What a blessing it all is.
God gives us gifts. I don’t want to miss them. I want to unwrap them and savor them, no matter how small. It gives me a joy that I can’t find anywhere else. I believe that a grateful heart IS the key to joy. Be thankful in everything…it makes a difference. Start a thankful jar. Fill it with at least 5 things you are thankful for a day and when you find yourself feeling sad or unsatisfied or down in any way just take them out and read them. Life IS all these little things and if we miss them, we miss the WHOLE of life.
Giving thanks for the little things can bring you joy every single day and feeling joyful can change your life.
I snap a picture of that perfect golden light hitting my humble plate of food and I give thanks.
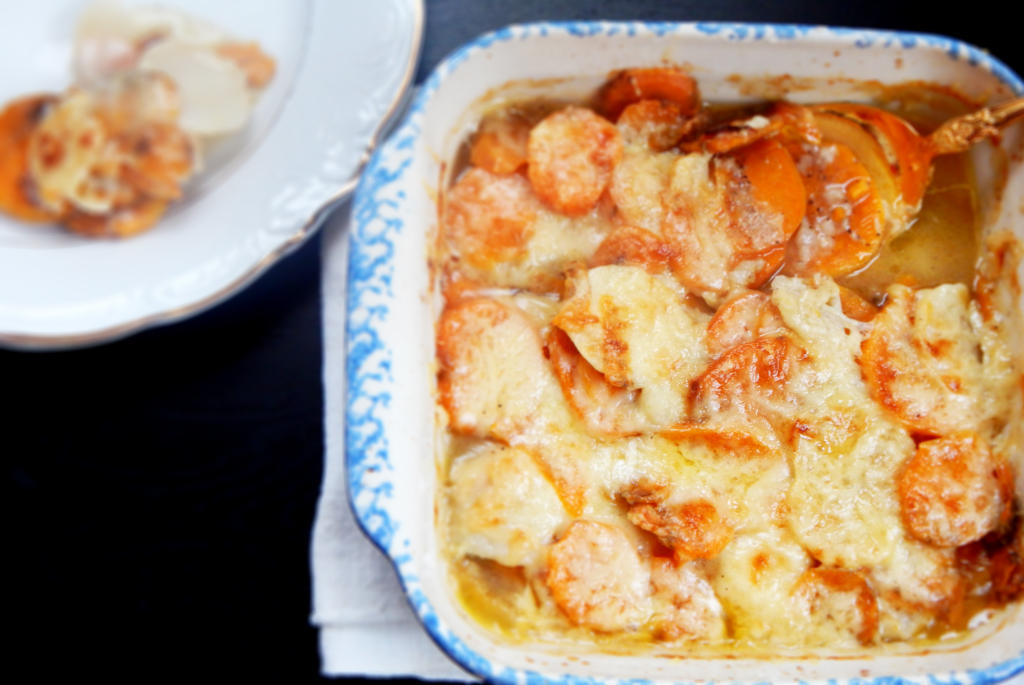
Sweet Potato and Turnip Gratin
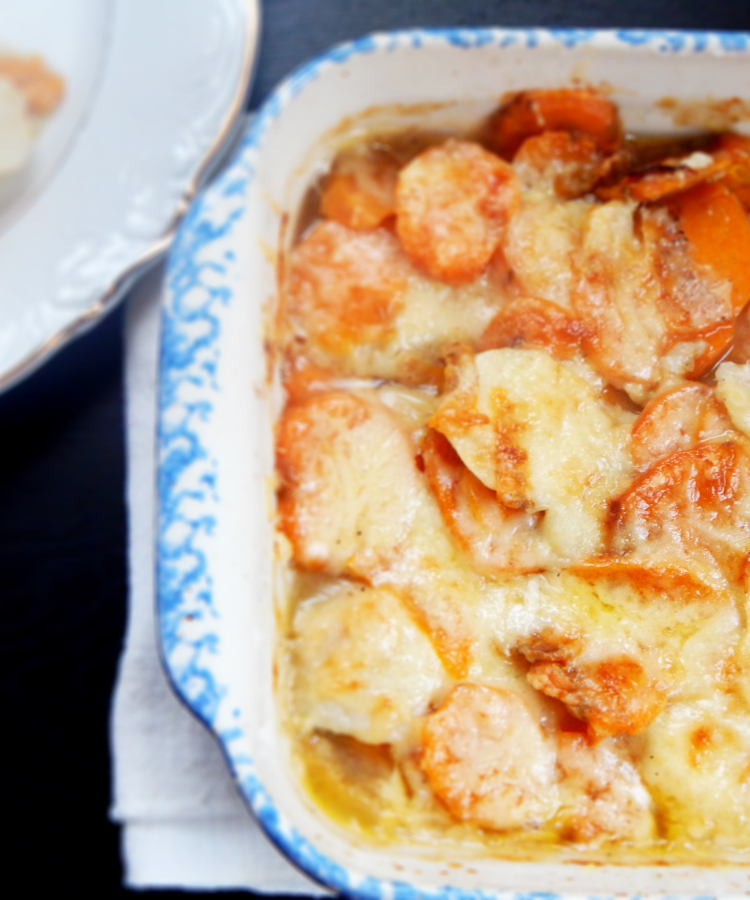
If you still haven’t finished up your menu for Thanksgiving or you’re supposed to bring a side and you haven’t decided what to bring yet, this one is perfect! Sweet potatoes are classic Thanksgiving fare but this recipe adds earthy turnips to the mix which is unexpected but oh so good! The addition of Gruyère cheese and white wine elevate it to special occasion status but it’s easy enough to make anytime!
Take care to slice the sweet potatoes and turnips no more than 1/4 inch thick. I tried my mandoline but found the slices were way to thin so I used a sharp knife instead. Be sure to salt and pepper and add flour to each layer. Gently pour over the chicken broth and wine, cover with foil and bake. Add the cheese after the potatoes are tender and brown in the oven, it’s that simple! If you’re feeding more than six you may want to double this recipe and bake it in a 13 x 9 pan. You will definitely want to taste the potatoes to make sure they are tender before adding the cheese. I needed a full hour in the oven to get mine tender.
If you make this, let me know what you thought! Tom taste-tested this for me about a half hour ago…he’s now sleeping! He taste-tested A LOT of it so I think that means he liked it! 🙂


- 1 1/2 pounds turnips (about 3 medium), peeled and cut into 1/4-inch-thick rounds
- Salt and ground pepper
- 1/4 cup all-purpose flour
- 1 pound sweet potatoes (about 2 medium), peeled and cut into 1/4-inch-thick rounds
- 2 tablespoons unsalted butter, cut into pieces
- 3/4 cup low-sodium chicken or vegetable broth
- 1/4 cup dry white wine, such as Sauvignon Blanc
- 1 cup grated Gruyere cheese (4 ounces)
- Preheat oven to 350 degrees.
- In an 8-inch square baking dish, arrange a single layer of turnips and sweet potatoes, overlapping slightly.
- Season with salt and pepper and sprinkle with one-third of the flour.
- Repeat to make three more layers, sprinkling with salt, pepper, and flour between layers.
- Dot top layer with butter, then slowly pour broth and wine into dish, keeping layers intact.
- Cover with foil and bake until vegetables are tender when pierced with a knife, 45 minutes to an hour, taste to be sure the potatoes and turnips are tender before adding the cheese.
- Increase oven temperature to 425 degrees.
- Remove foil and sprinkle cheese over dish.
- Bake until cheese is golden and bubbling, 12 to 15 minutes.
- Let gratin sit 10 minutes before serving.
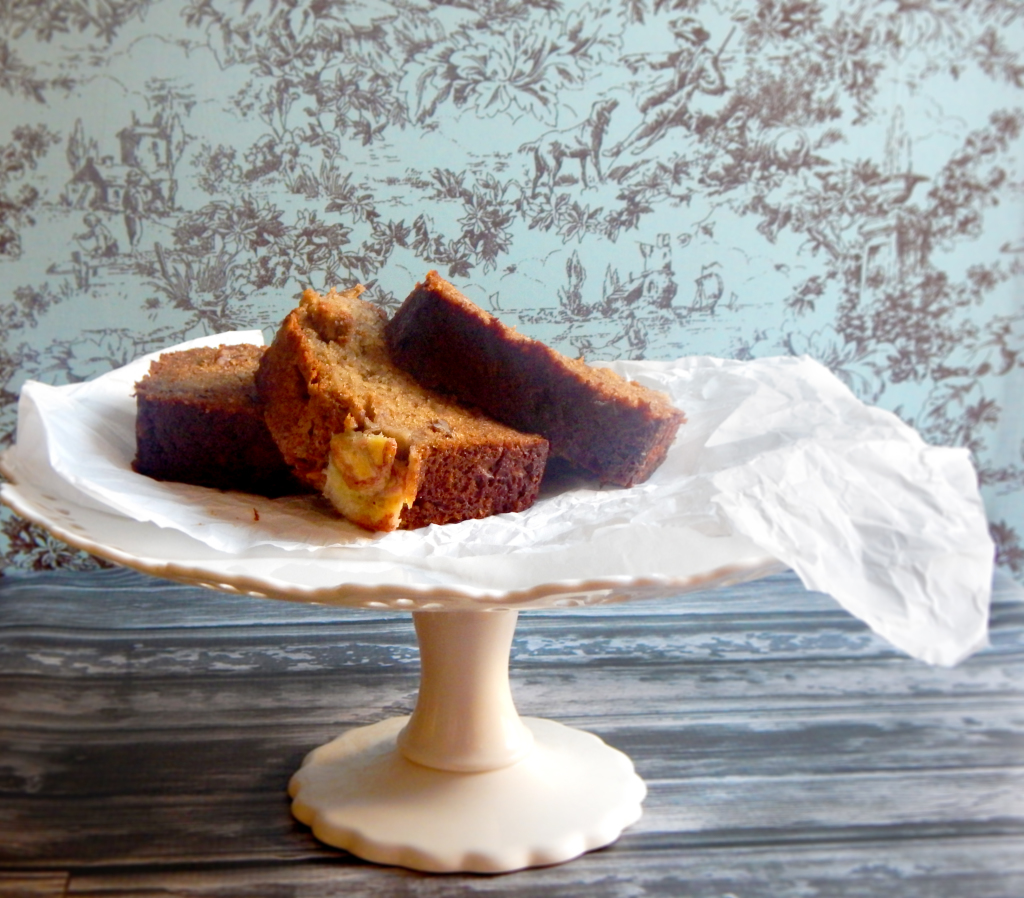
The Ultimate Banana Bread

If you’re looking for the best banana bread but don’t want to make a dozen recipes trying to find it, rest easy, I’ve done it for you! This recipe from Cooks Illustrated has a little science behind it in extracting the most banana flavor possible from bananas for a moist, tender loaf with over-the-top banana flavor!
Most banana bread recipes use just 3 bananas but this one uses 6! How do you add that many bananas without getting pudding you ask? There’s a secret to it….we’ll extract the juice from the bananas!
Who Knew Bananas had Juice?
We’ll add banana flavor without adding too much moisture to our banana bread by microwaving the fruit and draining it. Then we’ll simmer the banana liquid in a saucepan until it’s reduced and then incorporate it into the batter. We’ll use brown sugar instead of granulated and swap out oil for the nutty richness of butter. Toasted pecans give our banana bread a nice crunch, and a sixth banana sliced thin and caramelized on top of the loaf gives this banana bread an enticingly crisp, crunchy top.
Do it Ripe!
As bananas ripen, their starch converts to sugar so be sure to use very ripe, heavily speckled (or even black) bananas in this recipe. If you use anything less than very ripe bananas, you’ll end up with a very bland loaf.
EXTRACT JUICE
Microwaving ripe bananas for 5 minutes causes them to release “juice.”
STRAIN IT OUT
After straining the bananas, you should have 1/2 to 3/4 cup of liquid to work with.
REDUCE THE JUICE
Reducing the banana liquid yields a concentrated liquor, intensifying flavor without making the loaf wet.
Pour the reduced banana juice back into the bananas, mash and add the butter, eggs, brown sugar and vanilla. Pour banana mixture into the flour mixture and stir until just combined with some streaks of flour remaining. Gently fold in the pecans. Pour the batter into a pan sprayed with cooking spray. Add the 6th banana to the top, layering the banana slices on either side of the loaf. This will add more banana flavor and it looks pretty! Make sure to leave a 1 1/2 inch wide space down the center so the loaf will rise evenly.
It really is best after it’s been cooled a bit and fresh from the oven. That’s when the crust is the crunchiest! Okay enough talking, the banana bread is calling me! 🙂


- 1 3/4 cups unbleached all-purpose flour
- 1 teaspoon baking soda
- 1/2 teaspoon table salt
- 1 teaspoon cinnamon
- 6 large very ripe bananas (about 2 1/4 pounds), peeled
- 8 tablespoons (1 stick) unsalted butter, melted and cooled slightly
- 2 large eggs
- 3/4 cup packed light brown sugar
- 1 teaspoon vanilla extract
- 1/2 cup pecans or walnuts, toasted and coarsely chopped
- 2 teaspoons granulated sugar, for sprinkling on top
- Adjust oven rack to middle position and heat oven to 350 degrees. Spray 9-inch loaf pan with nonstick cooking spray. Whisk flour, baking soda, salt, and cinammon together in large bowl.
- Place 5 bananas in microwave-safe bowl; cover with plastic wrap and cut a few steam vents in plastic with small knife. Microwave on high power until bananas are soft and have released liquid, about 5 minutes. Transfer bananas to fine-mesh strainer placed over medium bowl and allow to drain, stirring occasionally, 15 minutes (you should have 1/2 to 3/4 cup liquid).
- Transfer liquid to medium saucepan and cook over medium-high heat until reduced to 1/4 cup, about 5 minutes. Remove pan from heat, stir reduced liquid into bananas, and mash with potato masher until fairly smooth. Whisk in butter, eggs, brown sugar, and vanilla.
- Pour banana mixture into flour mixture and stir until just combined with some streaks of flour remaining. Gently fold in walnuts, if using. Scrape batter into prepared pan. Slice remaining banana diagonally into 1/4-inch thick slices. Shingle banana slices on top of either side of loaf, leaving 1 1/2-inch-wide space down center to ensure even rise. Sprinkle granulated sugar evenly over loaf.
- Bake until toothpick inserted in center of loaf comes out clean, 50 to 70 minutes. Cool bread in pan on wire rack 15 minutes, then remove loaf from pan and continue to cool on wire rack. Serve warm or at room temperature.
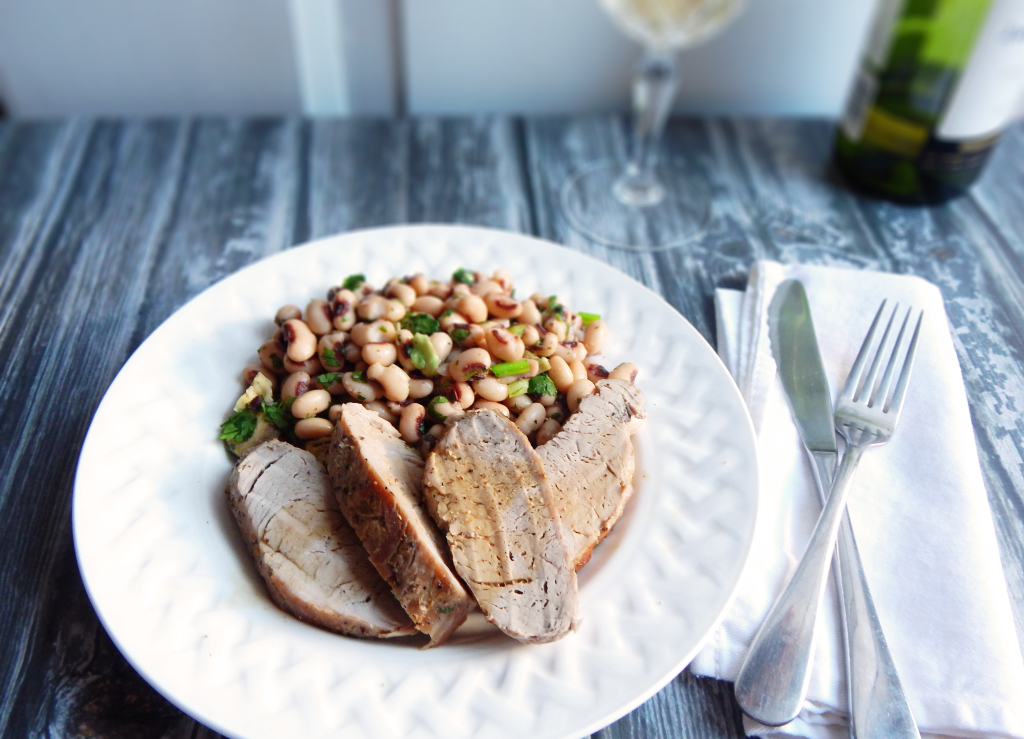
Quick and Easy Broiled Pork Tenderloin and Black-Eyed Pea Salad for Two
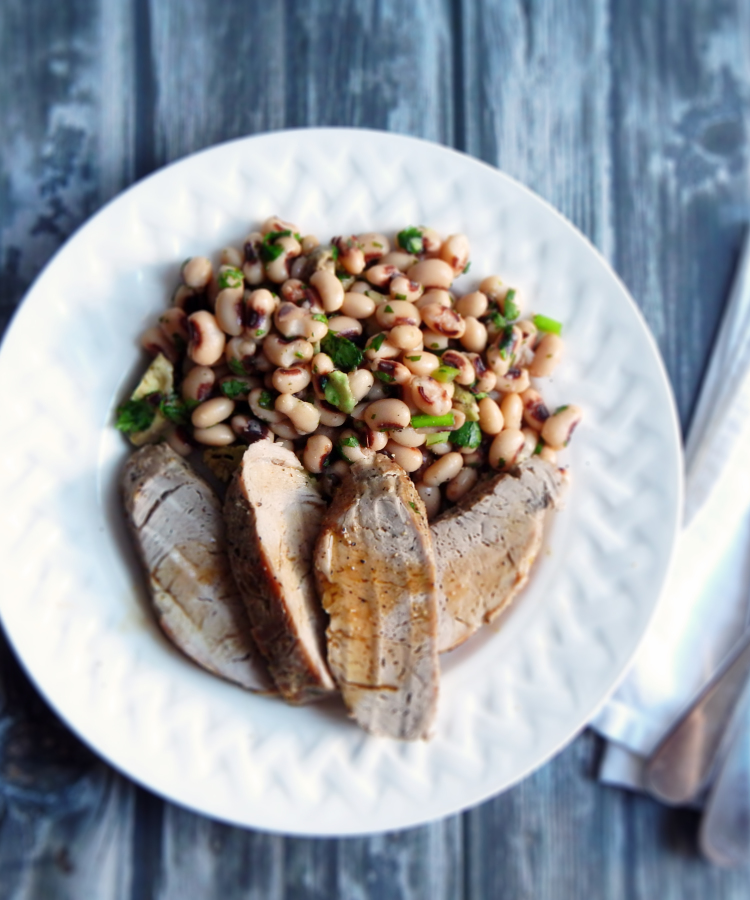
I love fast, easy meals during the week. This recipe is healthy, low in fat, diabetic friendly, and you can have it on the table in 20 minutes! I think the broiler is so under utilized. I don’t know why I don’t use it more often, it’s so quick! Toss the pork in the oven and in 10 minutes it’s done! I also love the black-eyed pea salad and could just make a meal off of that alone! I love how it doesn’t have any oil in the dressing, just fresh lime juice. I have used bottled lime juice when I didn’t have any limes and it was great! I have also substituted cilantro for the parsley when I had too much cilantro in the fridge.
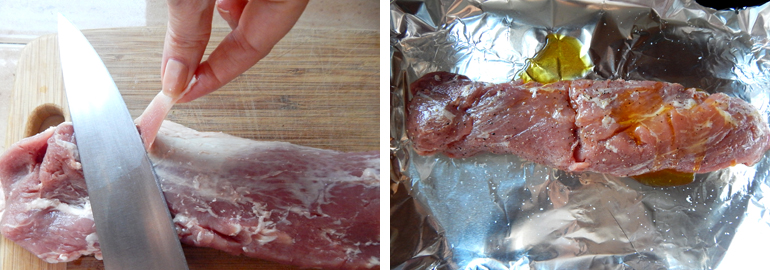
The first thing you’ll want to do is to set your oven to broil and raise the rack in your oven to the top. Next you’ll remove the silver skin on the pork loin, it’s tough and can cause the pork to curl if it’s not removed. Remove any fat as well. Rub a teaspoon of oil on the meat and then season with salt and pepper. I like to line the pan with foil for easy clean up. Place the pork loin in the oven and set a timer for 5 minutes to check it and turn it if it’s brown. You’ll want to turn the pork once for even cooking.
 While the pork is cooking go ahead and rinse your peas really well. Place the rinsed and drained peas in a bowl and add 1/2 of a diced avocado, 1 scallion, and 2 tablespoons of chopped parsley and fresh lime juice.
Check the pork if you haven’t already and flip it for another 5 minutes. Insert an instant read thermometer. You’ll want a temperature between 140-145 degrees. Let the meat rest for 10 min. Slice against the grain and drizzle the pork with any pan juices. Enjoy!

- 1 can (15 ounces) black-eyed peas (preferably no salt added), drained and rinsed well
- 1/2 avocado, halved, pitted, peeled, and diced medium
- 1 scallion, thinly sliced
- 2 tablespoons chopped fresh parsley
- 1 tablespoons fresh lime juice
- Coarse salt and ground pepper
- 12 ounces pork tenderloin, excess fat and silver skin removed
- 1 teaspoon olive oil
- Heat broiler, with rack in top position. In a medium bowl, combine black-eyed peas, avocado, scallions, parsley, and lime juice. Season with salt and pepper and mix well.
- Rub pork with oil and season with salt and pepper. Place on a rimmed baking sheet lined with foil. Cook 10 to 12 minutes for medium, turning frequently (an instant-read thermometer should read 145 when inserted in center of pork). Let rest 10 minutes. Thinly slice pork and serve with salad and any cooking juices from sheet.
- You can double the salad easily if you want left-overs to take to lunch the next day. I also know the pork sizing seems a bit off for two people but I can never find a pork loin much smaller than 12 ounces.
Salted Butter Caramel Sauce

Ooey, gooey caramel…who doesn’t love caramel?! I love it on ice cream, I love to dip fruit in it…I love to eat it right out of the jar! I also love it drizzled on apple desserts like this Apple Crumble. This one’s easier because you add the water first instead of the sugar so you don’t have to worry about stirring right away. Keeping the lid on the pot also allows condensation to keep crystals from forming. Try it out if you’re new to making caramel sauce! Make sure your pot isn’t too small because when you add the cream the mixture will boil furiously.
If you don’t own a candy thermometer, spot-check the sugar syrup with an instant-read thermometer that can read temperatures in excess of 350 degrees. Otherwise, follow the time approximations in the recipe and watch the color of the sugar syrup; it should be a deep amber color before the cream is added. To keep the sauce from clumping, make sure the cream is hot before adding it to the sugar syrup; try to coordinate it so that the cream reaches a simmer when the sugar syrup reaches 350 degrees.


- 2 cups granulated sugar
- 1 cup heavy cream
- pinch table salt
- 2 tablespoons salted butter, cold
- pinch of sea salt if desired
- Pour 1 cup water into 2-quart heavy-bottomed saucepan.
- Add sugar to center of pot to keep granules from adhering to sides of pot.
- Bring to boil over high heat, covered.
- Uncover pot, insert candy thermometer, and continue to boil until syrup is thick and straw-colored, registering 300 degrees on candy thermometer, about 15 minutes.
- Reduce heat to medium; continue to cook until sugar is deep amber, begins to smoke, and registers 350 degrees on candy thermometer, about 5 minutes longer.
- Meanwhile, when temperature of syrup reaches 300 degrees, bring cream and salt to simmer in small, heavy-bottomed saucepan over high heat. (If cream reaches simmer before syrup reaches 350 degrees, remove cream from heat and set aside.)
- Remove sugar syrup from heat.
- Pour about one quarter of hot cream into sugar syrup; let bubbling subside.
- Add remaining cream; let bubbling subside.
- Whisk gently until smooth; whisk in butter. Let cool until warm.
- Can be covered and refrigerated up to 1 month; reheat in microwave or small saucepan over low heat.
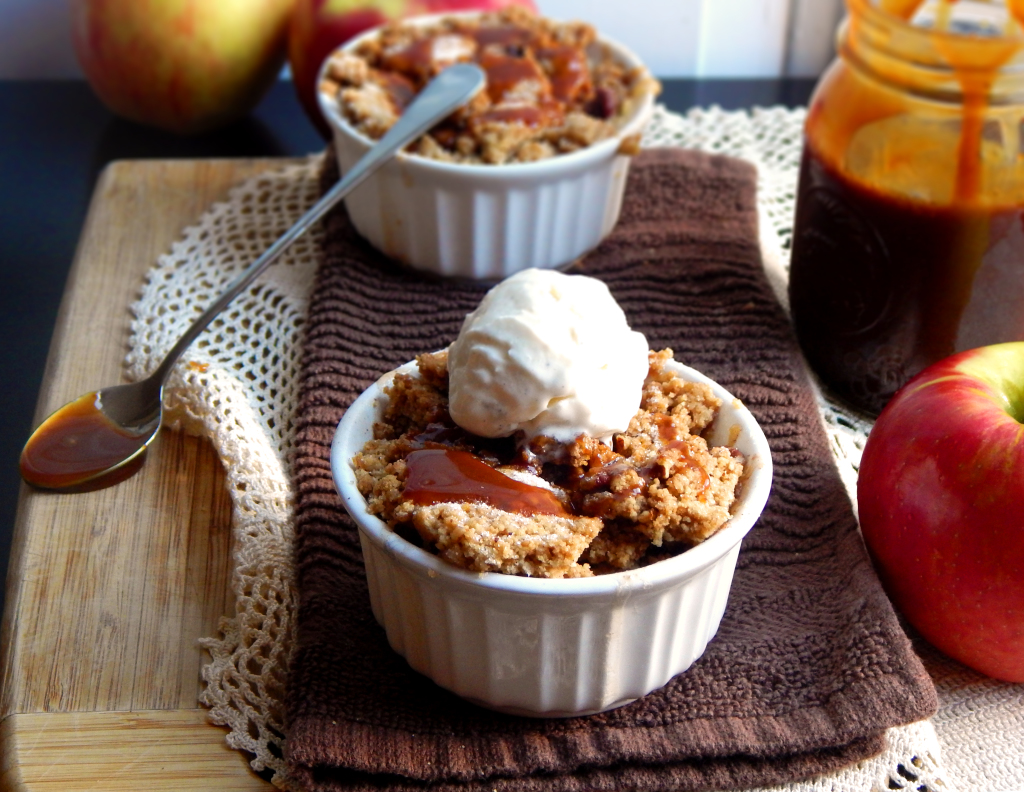
Apple Crumble with Salted Butter Caramel Sauce

So, desserts have always been my thing and everyone is asking…”Where are your desserts?!” Scaling down desserts for two isn’t the easiest thing in the world but this one was super easy! So here it is, my first dessert on the blog and I promise many more to come!
Now I know that they say that an apple a day will keep the doctor away but what about an apple crumble?! I kind of doubt it, but this recipe is still great because of it’s perfect little sweet portion control size! You only get one and it really is just the right amount! Everything in moderation, right? 🙂
I love everything apple. Apple pie a la mode is one of my favorite desserts but most of the time I don’t want to fuss with making a crust for apple pie. That’s why I love apple crumble! I have had some crumbles that ended up with a soggy topping and flavorless filling until I tried this recipe with a simple way to make crisp, crunchy crumble and an apple filling that tastes like apple!
Another thing I love is caramel. Caramel and apples just go together! I decided that I wanted to have that caramel flavor with my crumble so I made a quick no-stir Salted Butter Caramel Sauce to drizzle over the top! Yeah, I don’t know when to stop. As if that wasn’t enough, I added a scoop of vanilla ice cream! Maybe that’s gilding the lily but so what, I like my lilies gilded!
The trick to keeping your crumble crisp is to bake it for 20 minutes on a parchment paper lined cookie sheet before adding it to the apple filling. This step insures perfect crumble every time!


- 1/4 teaspoon cornstarch
- 2 teaspoons fresh lemon juice, (approximately 1/2 lemon)
- 1 Granny Smith apple, peeled and cut into 1/2-inch cubes (about 1 cup)
- 1 Golden Delicious apple, peeled and cut into 1/2-inch cubes (about 1 cup) or any sweet apple
- 1/3 cup granulated sugar
- Pinch table salt
- Pinch ground cinnamon
- Pinch ground nutmeg
- 1/2 cup unbleached all-purpose flour
- 2 Tbsps granulated sugar plus 1 tsp
- 2 Tbsps packed brown sugar (light or dark)
- Pinch table salt
- 1 teaspoons vanilla extract
- 3 tablespoons unsalted butter, cut into 3 pieces and very soft
- 1/4 cup chopped pecans
- Adjust oven racks to lower and middle positions; heat oven to 350 degrees.
- Combine cornstarch and lemon juice in medium bowl until cornstarch is dissolved. Add apples, sugar, salt, cinnamon, and nutmeg; toss to combine. Divide apple filling between two ramekins, cover with foil.
- Combine flour, sugars (reserving 1 tsp granulated sugar), and salt in workbowl of a food processor; drizzle vanilla over top. Pulse to combine, about five 1-second pulses. Add butter and half of pecans; process until mixture clumps together into large, crumbly balls, about 30 seconds. Sprinkle remaining pecans over mixture and combine with 2 quick pulses. Transfer mixture to parchment-lined baking sheet and spread into even layer. Place topping mixture on middle rack in oven and apple filling mixture on lower rack. Bake topping until lightly browned and firm, about 20 minutes. Remove both topping and apples from oven.
- Remove foil from apple filling and gently stir. Slide topping over apples and spread into even layer with spatula, packing down lightly and breaking up any very large pieces. Sprinkle remaining tsp sugar over top and place on middle oven rack. Bake until well browned and fruit is tender and bubbling around edges, about 25 minutes. Cool on wire rack until warm, at least 15 minutes; serve with Salted Butter Caramel and a scoop of vanilla ice cream.
- I noticed that my apples were a bit too done and next time I will leave off the first 20 minute bake time with the crumble and will only do the second bake time but that's because I like the apples to still have a bit of firmness, that's just my personal preference.
- You can also easily double this recipe.
Easy Beef Stew for Two

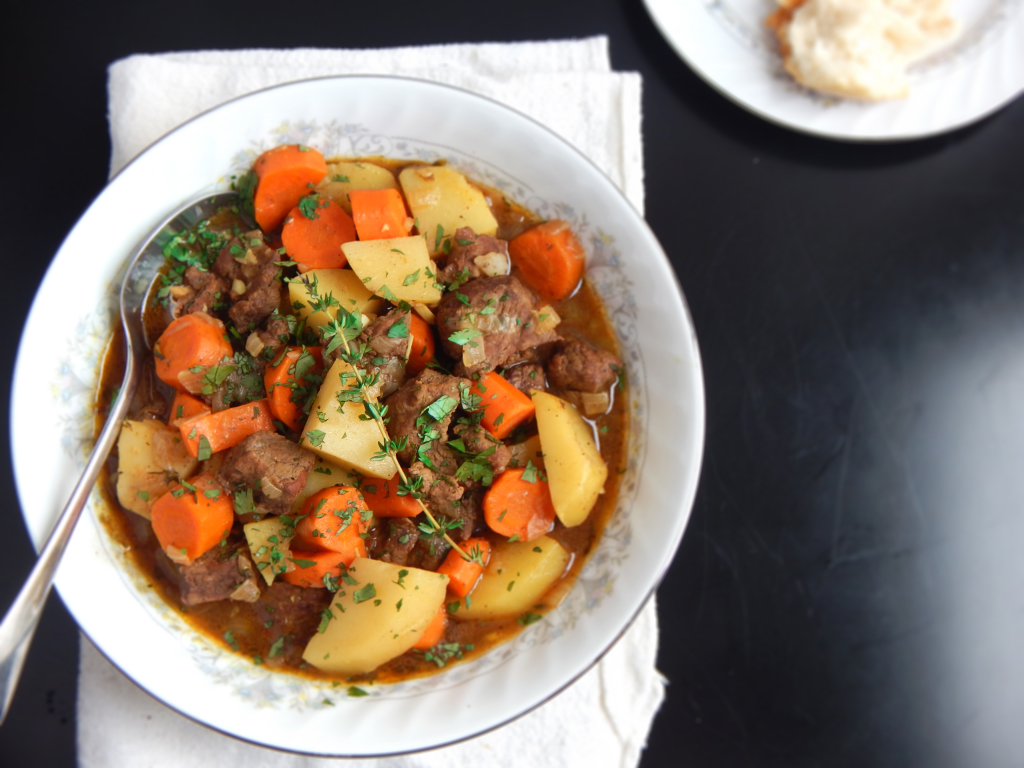
It’s cold out today! When it’s cold out I immediately think of warm, comforting food and this super easy full-bodied stew is perfect for cold days! This red wine-braised beef stew is the ultimate one-pot meal, loaded with tender potatoes and carrots. Don’t forget a loaf of crusty French bread for sopping up the rich sauce.
Many stew recipes call for cooking the meat and vegetables at the same time, leaving the vegetables overcooked and mushy. Instead, first braise the meat with onions in red wine and beef broth until a rich sauce develops. Then, after about an hour, add carrots, and potatoes. By the time the vegetables are cooked, the beef will be tender, then just stir in some peas if you like, for a little freshness and color. I sprinkle a little fresh parsley in at the end. You can also spoon the stew over buttered egg noodles. YUMMY!


- 1 pound beef stew meat or boneless beef short ribs, trimmed and cut into 1 1/2-inch pieces
- Salt and pepper
- 1 tablespoon vegetable oil
- 1 small onion, chopped fine
- 2 garlic cloves, minced
- 1 teaspoon tomato paste (freeze leftover tomato paste in a ziploc bag)
- 1/2 teaspoon minced fresh thyme or 1/8 teaspoon dried
- 1 tablespoon all-purpose flour
- 1/4 cup dry red wine
- 1 1/2 cups beef broth
- 1 bay leaf
- 1 Yukon Gold potato (8 ounces), cut into 3/4-inch pieces
- 2 carrots, peeled and sliced 3/4 inch thick
- 1/4 cup frozen peas
- 1 tablespoon minced fresh parsley
- Adjust oven rack to middle position and heat oven to 300 degrees. Pat beef dry with paper towels and season with salt and pepper. Heat oil in medium ovensafe saucepan over medium-high heat until just smoking. Brown beef on all sides, about 8 minutes; transfer to bowl.
- Add onion to fat left in saucepan and cook over medium heat until softened, about 5 minutes. Stir in garlic, tomato paste, and thyme and cook until fragrant, about 30 seconds. Stir in flour and cook for 1 minute.
- Slowly whisk in wine, scraping up any browned bits and smoothing out any lumps. Stir in broth, bay leaf, and browned beef with any accumulated juices and bring to simmer. Cover, transfer saucepan to oven, and cook for 1 hour.
- Stir in potato and carrots and continue to cook in oven, covered, until beef and vegetables are tender, 2 hours or until vegetables are tender.
- Discard bay leaf. Using large spoon, skim excess fat from surface of stew, if needed.
- Stir in peas and let sit until heated through, about 2 minutes. Stir in parsley and season with salt and pepper to taste. Eat up!
- Serve with crusty bread or over buttered egg noodles.

French Toast for Two
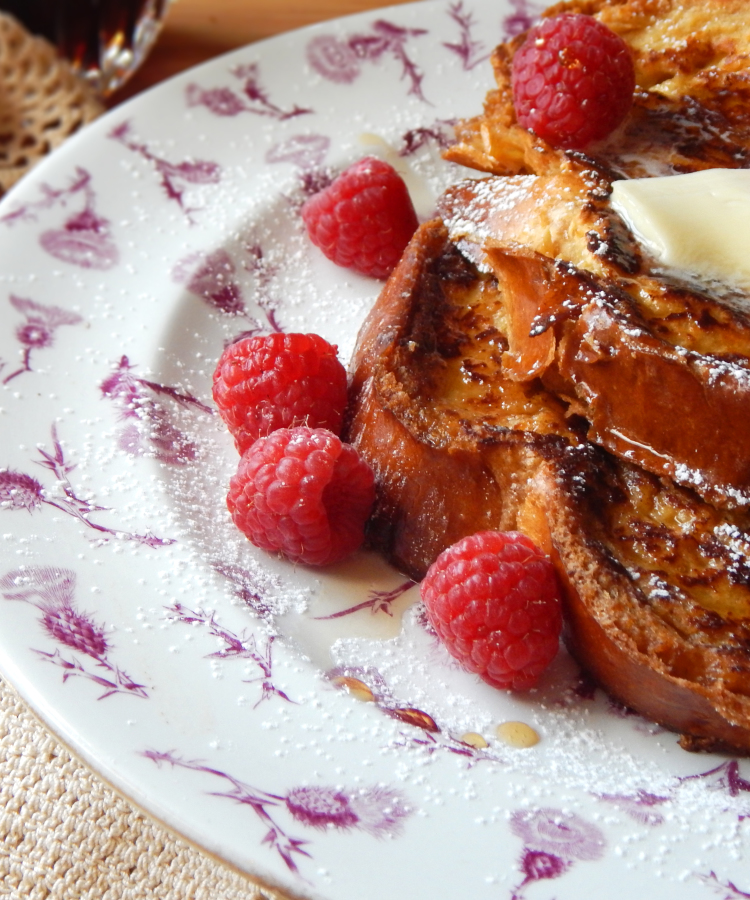
Rise and Shine!! It’s time to get out some bread, eggs, milk and just a few other ingredients and make this fantastic French toast recipe! You might wonder why anyone would need a French toast recipe. People have been soaking bread in an egg mixture to transform old bread into something new and wonderful for centuries! Honestly though, the results can be varied and not always so good. The bread turns out soggy or too eggy or just plain bland. This recipe takes care of all of these problems and will give you French toast that’s crisp on the outside, soft and puffy on the inside, with rich, custardlike flavor every time!
There are a couple of tricks to getting it right and they are super simple. First the bread. Sandwich bread works but ONLY if it’s the hearty type of sandwich bread like Arnold Country Classics White or Pepperidge Farm Farmhouse Hearty White. Regular sandwich bread will just give you gloppy French toast…nobody wants gloppy French toast! You could also use a challah or brioche from the bakery which is what I did here. Honestly, Italian and French bread turn out a really chewy French toast…not ideal.
The key to getting French toast that isn’t too soggy is to dry the bread out. It’s a must! Preheat the oven to 300 degrees. If your bread isn’t sliced you’ll want to slice it into 1/2 inch slices and lay the bread out on a wire rack set in a baking sheet. You’ll bake the bread for 16 minutes flipping half way through. This will remove the moisture that makes for a soggy French toast.
Next up, we’ll deal with French toast that’s just too eggy. The key here is to use only the yolks. It’s the whites that contain the sulphur compounds that give off that eggy taste (and smell) and the whites can also have that unappealing ropy texture, you know what I mean? When it’s on your bread and you fry it, it can give your bread a white speckled appearance. So we’ll leave off the whites and only use the yolks!
We want to add some flavor to our mixture so a little cinnamon, vanilla and brown sugar are added, also we’ll add some butter to the dipping mixture to bump up the YUM factor. You will want to warm your milk in the microwave so that your melted butter doesn’t solidify on contact with the mixture. You can pour your mixture in a 13×9 pan and soak the pieces 3 at a time or whatever will fit so that your bread will soak up the liquid more evenly.
Soak the bread for only 20 seconds per side. That might seem short to you but it works. Any longer and you start getting into soggy territory. Fry your egg mixture soaked bread in a little butter on medium low for 3-4 minutes per side. You can use an electric griddle but you may need to cook a bit longer. I sprinkled ours with powdered sugar and handed Tom the first batch to test, he finished it off faster than I could say pass the syrup! I think he liked it. 🙂


- 4 large slices hearty white sandwich bread or qood-quality challah
- 1 1/2 cups whole milk, warmed
- 3 large egg yolks
- 3 Tbsps light brown sugar
- 1/2 tsp ground cinnamon
- 2 Tbsps unsalted butter, melted plus 2 Tbsps for cooking
- 1/4 tsp table salt
- 1 Tbsp vanilla extract
- Maple syrup
- Adjust oven rack to middle position and heat oven to 300 degrees.
- Place bread on wire rack set in baking sheet.
- Bake bread until almost dry throughout (center should remain slightly moist), about 16 minutes, flipping slices halfway through cooking. Remove bread from rack and let cool 5 minutes. Return baking sheet with wire rack to oven and reduce temperature to 200 degrees.
- Whisk milk, yolks, sugar, cinnamon, 2 tablespoons melted butter, salt, and vanilla in large bowl until well blended. Transfer mixture to 13x9 inch baking pan.
- Soak bread in milk mixture until saturated but not falling apart, 20 seconds per side. Using firm slotted spatula, pick up bread slice and allow excess milk mixture to drip off, repeat with remaining slices. Place soaked bread on another baking sheet or platter.
- Heat 1/2 tablespoon butter in 12 inch skillet over medium-low heat. When foaming subsides, use slotted spatula to transfer 2 slices soaked bread to skillet and cook until golden brown, 3 to 4 minutes.
- Flip and continue to cook until second side is golden brown, 3 to 4 minutes longer.
- If toast is cooking too quickly, reduce temperature slightly. Transfer to baking sheet in oven. Repeat cooking with remaining 2 pieces, adding 1/2 tablespoon of butter for each batch. Serve warm.
Peanut Butter-Pumpkin Dog Treats
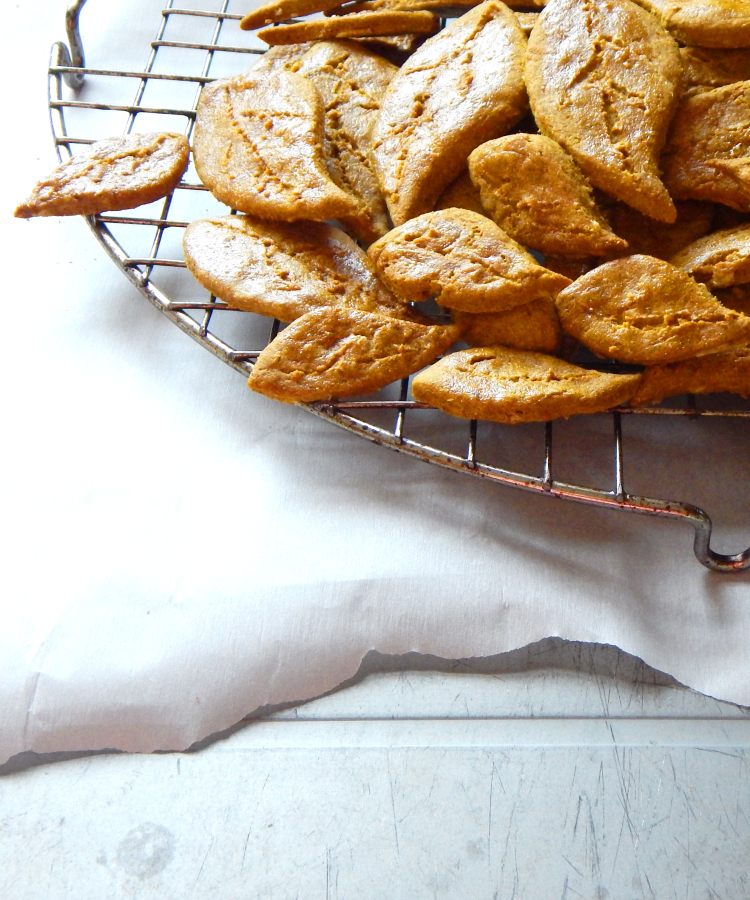
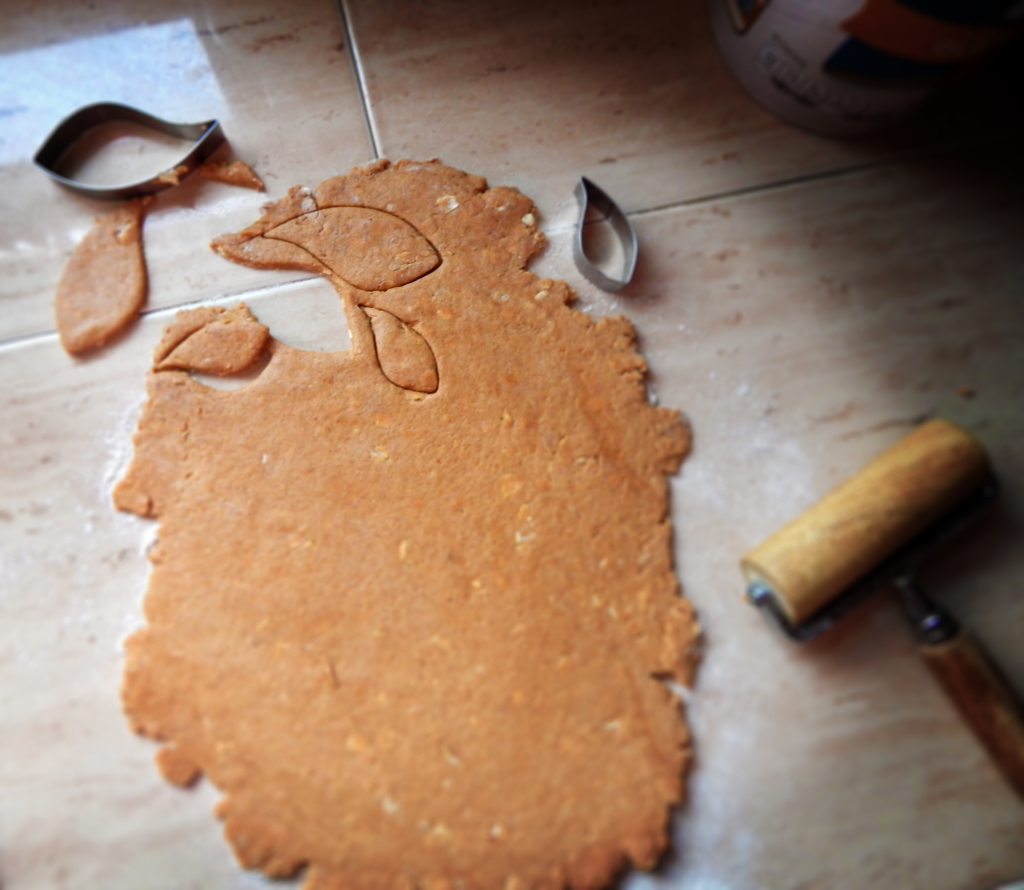
I didn’t want to leave Missy out of the pumpkin craze so I baked up these little dog treats! I don’t know about your dog but Missy LOVES peanut butter! All I have to do is unscrew the lid on the peanut butter and she wakes up out of a dead sleep and comes running. Then she stares me down until I giver her a taste! She was sooo happy about these treats and as you can see in the photo, she was just barely able to wait to eat one! I made these in the shape of leaves for fall. 🙂 They are super easy to throw together, just mix everything together, roll out and cut into shapes and bake!
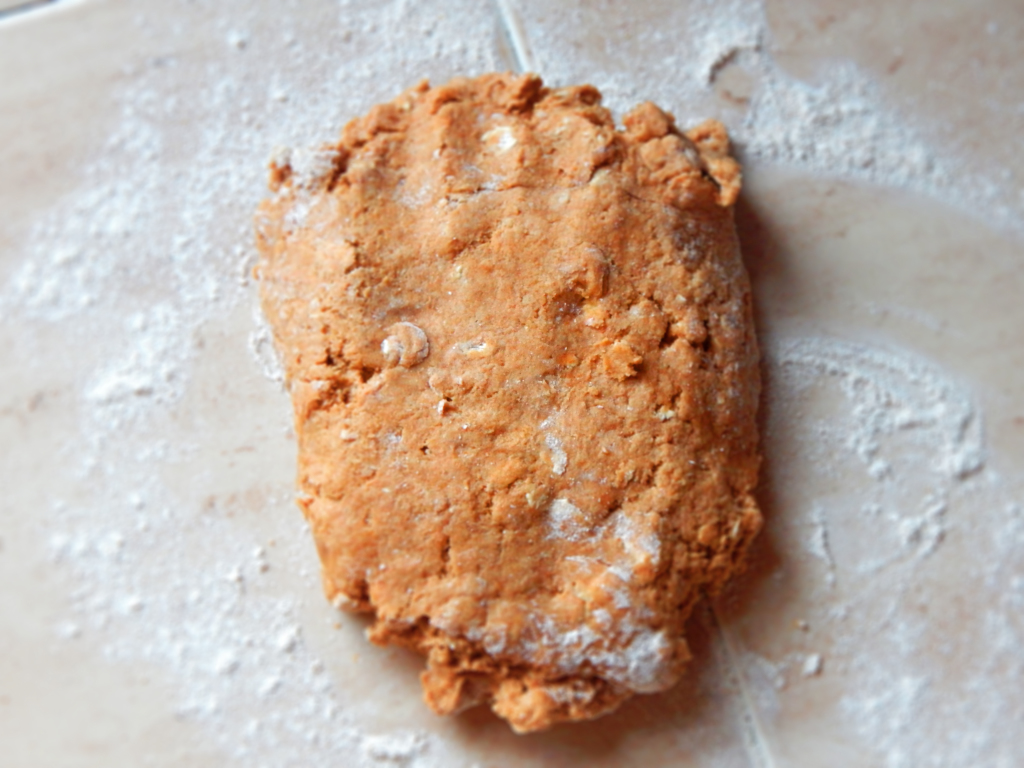
Flour the surface where you plan to roll these out. If they seem too sticky add a bit more flour.
Cut out the shapes with your favorite cookie cutter and place onto a parchment lined baking sheet. I sprayed mine lightly with cooking spray. I wanted a dryer treat than the last treats I made. One; because Missy likes crunchy treats and two; because the dryer the treat the longer it will last. Keep in mind though that these are all natural treats with no preservatives so I would only safely store them in a treat jar for 5 days. You can store them in the refrigerator for a month and the freezer for 3 months.
Show your doggie some love and bake these easy treats up today! <3


- 1 1/4 cups whole wheat flour
- 1/4 cup old fashioned oats
- 1 egg
- 3/4 cup canned pumpkin (only use pure pumpkin puree, not the pie filling)
- 1/4 cup peanut butter (smooth or crunchy, I used all natural smooth)
- 1/4 tsp. ground cinnamon
- water (I used 1/8 cup of water, you may need more or less)
- Preheat oven to 350° F
- Place all ingredients in a bowl.
- Stir until thoroughly combined.
- Roll out dough to 1/4" thickness and cut with cookie cutters.
- Place on a greased baking sheet and bake for 30 minutes. (see note below for a dryer cookie)
- In addition to the 30 minute bake time, lower your oven to 200 degrees and bake for an hour. Check on them though to make sure they aren't getting too brown. Turn off oven and leave treats in the oven to cool.


